
Gorgeous studio light on location
I love getting away from the studio and making great portraits outside, in nature, without the support and equipment that I have in the studio. Although I lose the control that the studio gives me, I gain a creative drive that is sometimes lacking in the studio. Given that I have fewer options available to me while on location I must be more creative with what I do have. Part of being creative with my equipment is know what is possible with it. I must understand how my speed-light can be used and what it can do for me while on location or in the studio. I must know the properties of light and how it will interact with my equipment. I must understand how to use my reflector/ diffuser to manipulate and use the available light. I must understand what my camera is capable of in regards to exposure, dynamic range, and color. You see… my equipment is incredibly important to what I am able to create, but if I do not train my mind to see and understand what is possible, my camera will never make that amazing image.
I recently was out in a beautiful location with my family and some friends during our Christmas holidays. I had gone prepared to make a few images and I wanted to specifically do it with very little equipment wanting to use only ambient light to see what portraits I could make with it.
The day was very sunny with only a few clouds. This made my light very bright and extremely harsh. The location was outside in a very rocky location next to the Mediterranean sea. There was no green around us with most of the area being brown, grey, black and with a lot of contrast because of the rough nature of the stone. The areas in the sun were also very specular because of the reflective nature of the stone.
Let me walk you through a few of the images that we made to show you what is possible. For all of these images I was using my Sony Alpha 6500 with the 85mm GMaster lens. This is one of my favorite portrait lens as it renders the face and skin beautifully with pleasing proportions and a lovely falloff. The ability to shoot at f1.4 and have the eyes tack sharp makes for a lens that performs perfectly for my style of portraiture. BTW all these images are only slightly adjusted in Capture One Pro (a slight adjustment of contrast, and bringing down some highlights and bringing up some shadows.) with no photoshop work or manipulation. I have also tried to draw a simple light diagram to help understand what I did. You can see clearly with these drawings why I make art with my camera and NOT by sketching.
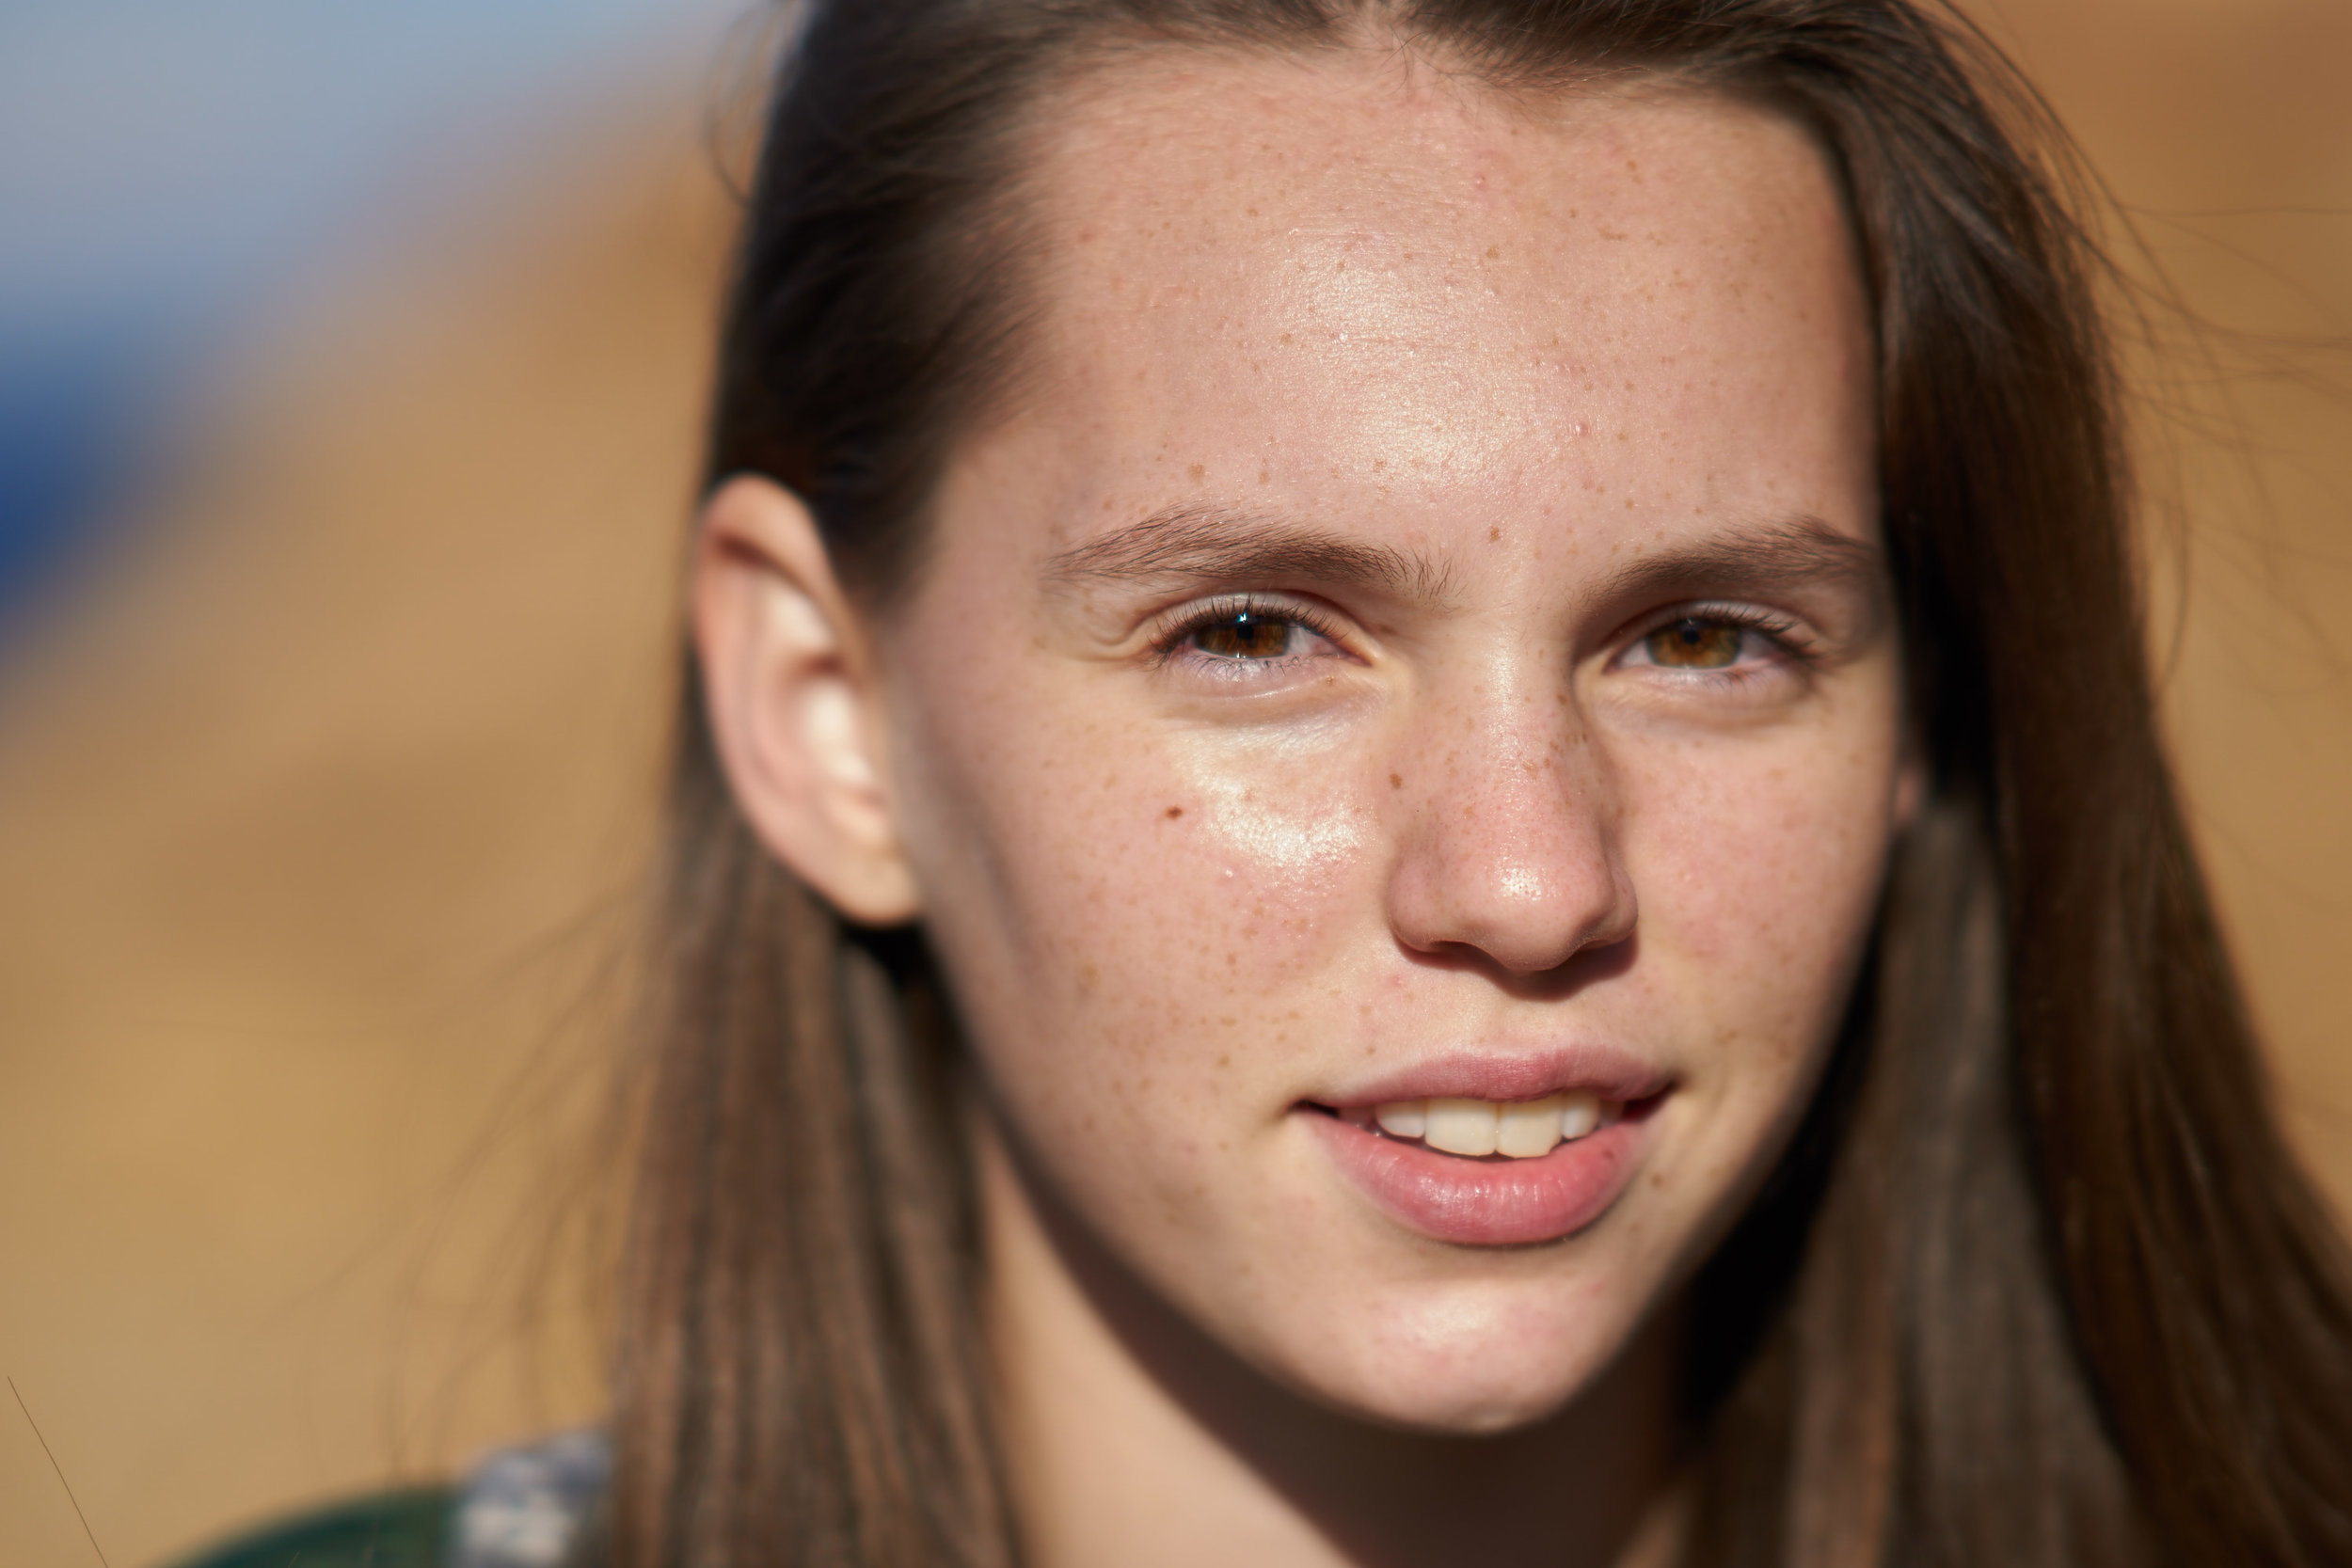
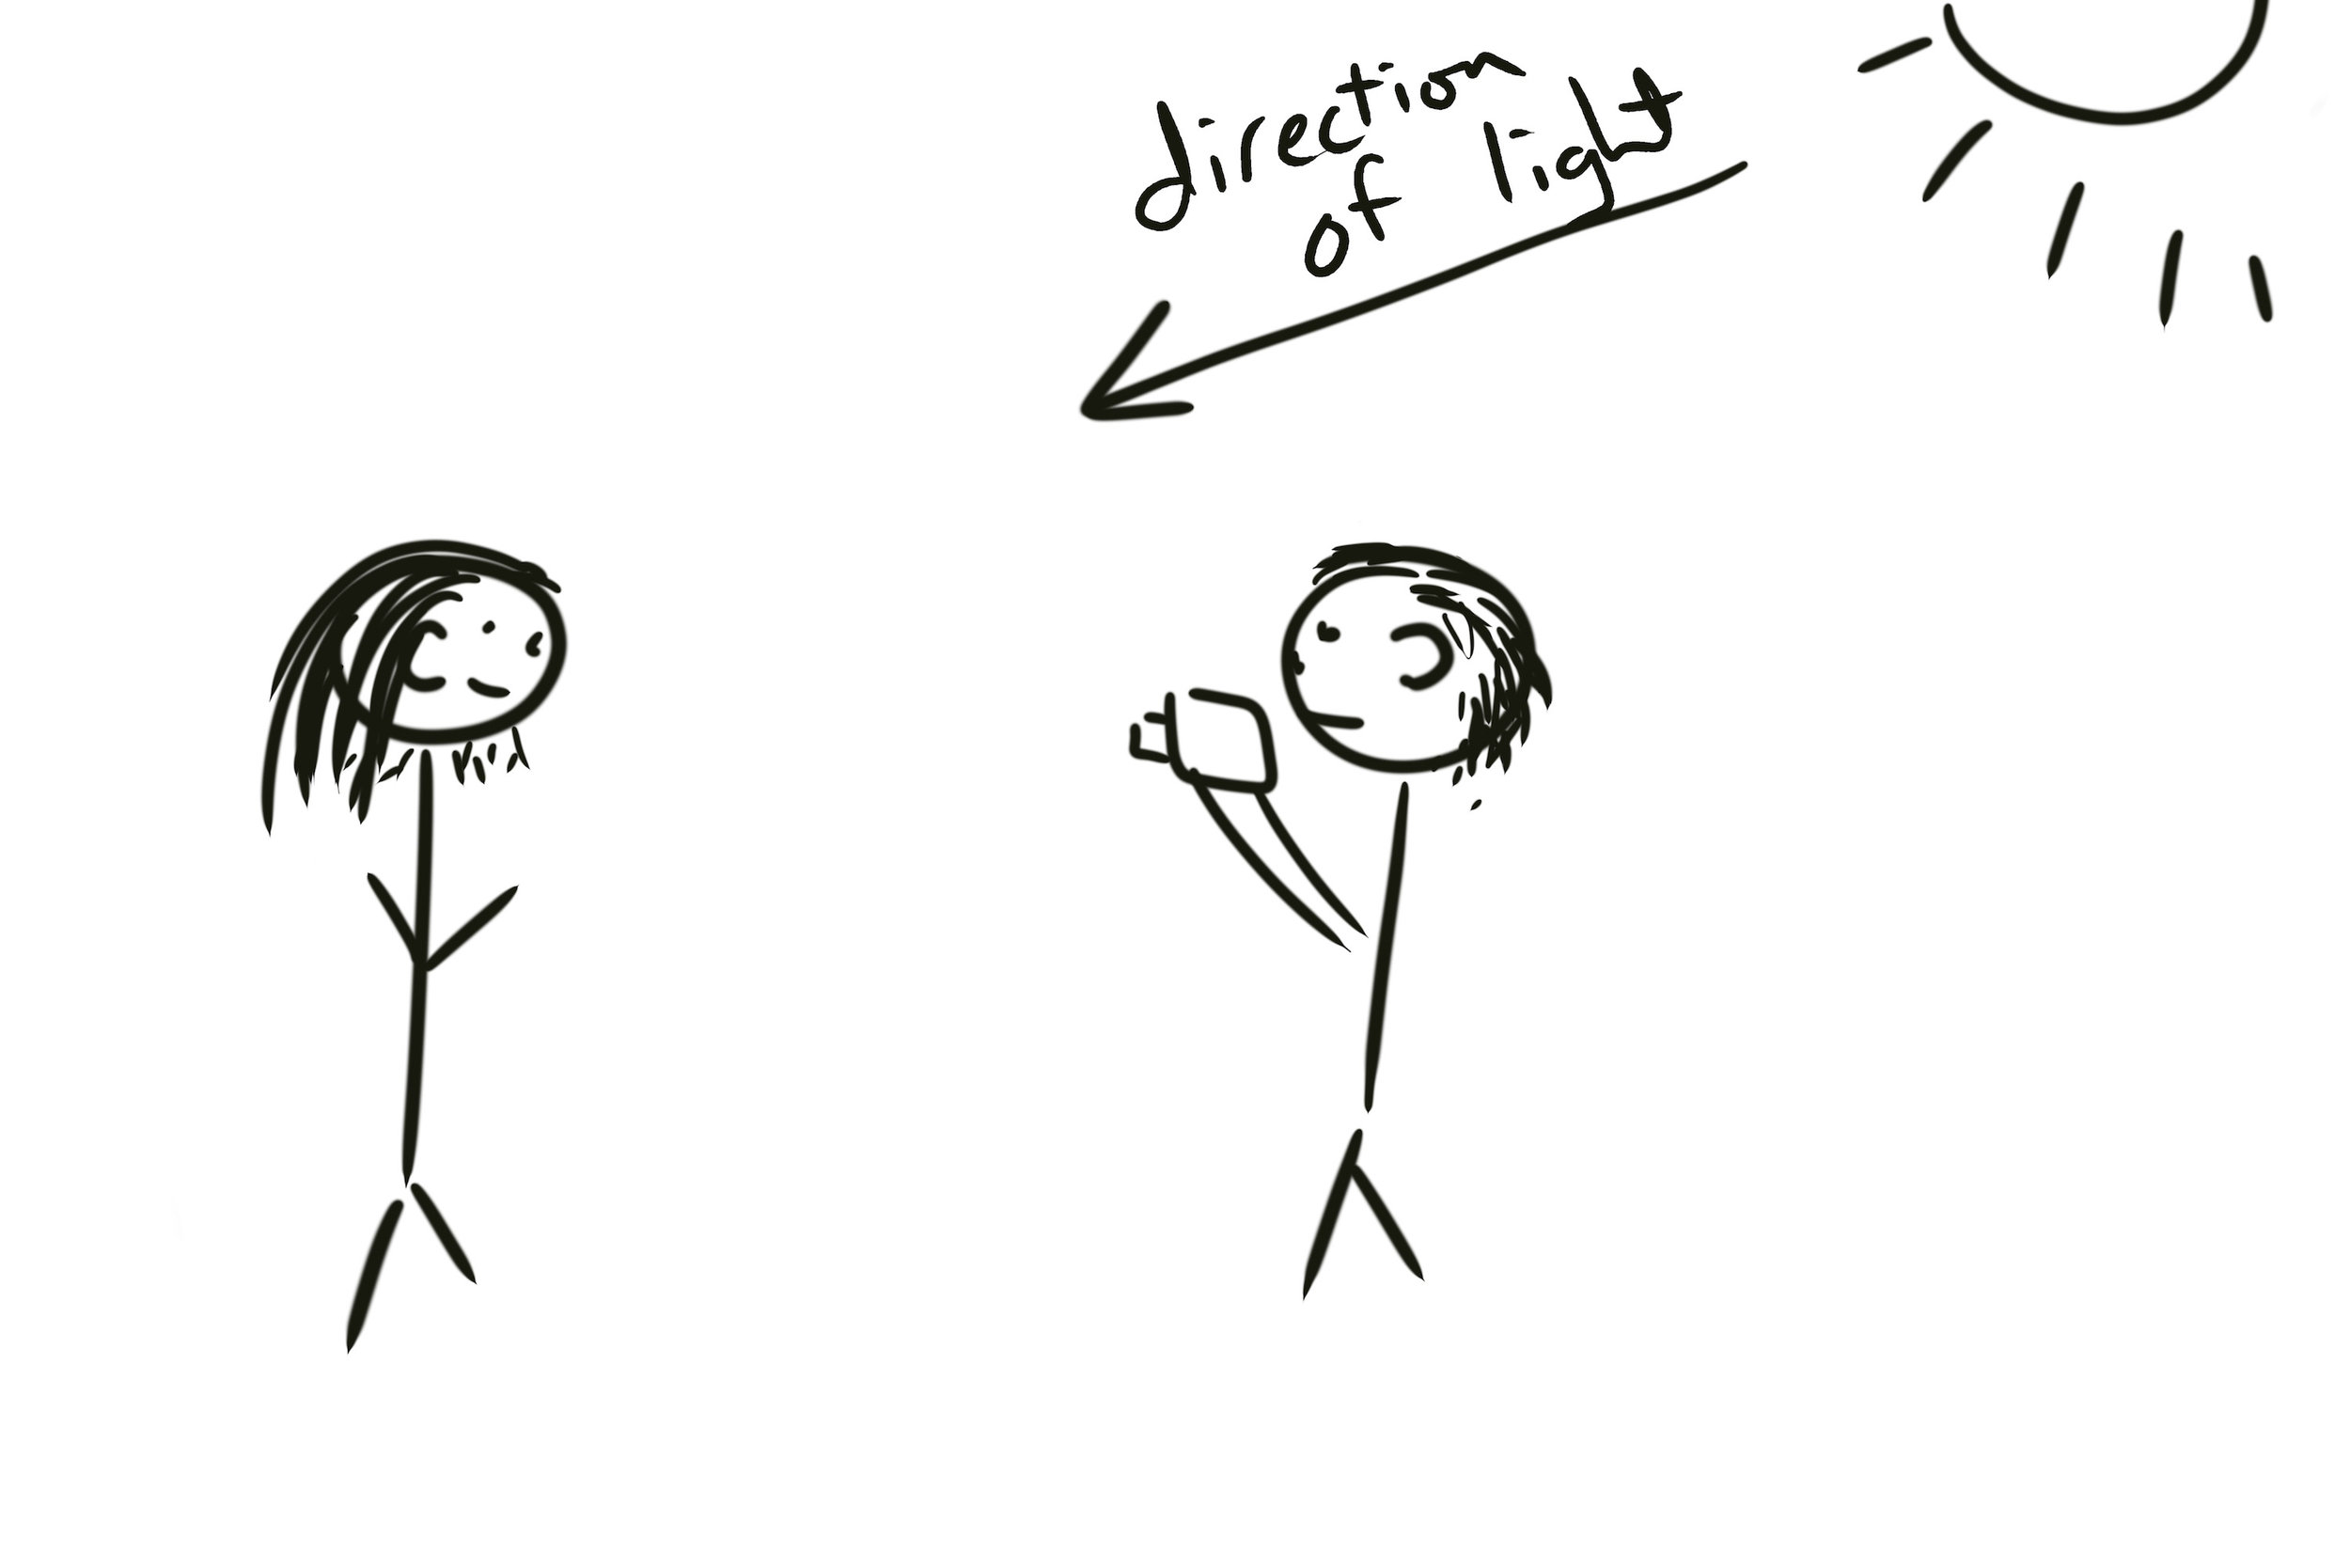

The first image shows you how harsh the light was with no modifier and on axis to the camera. Not very pleasing at all. It produces some nasty shadows as there is literally no transition area between lights and darks but only a harsh line. It produces a very small and overpowering catchlight in the eyes. Speaking of the eyes, our model is having a hard time keeping them open without straining the muscles around the eyes. This does not help our final image at all. So we really need to modify something…
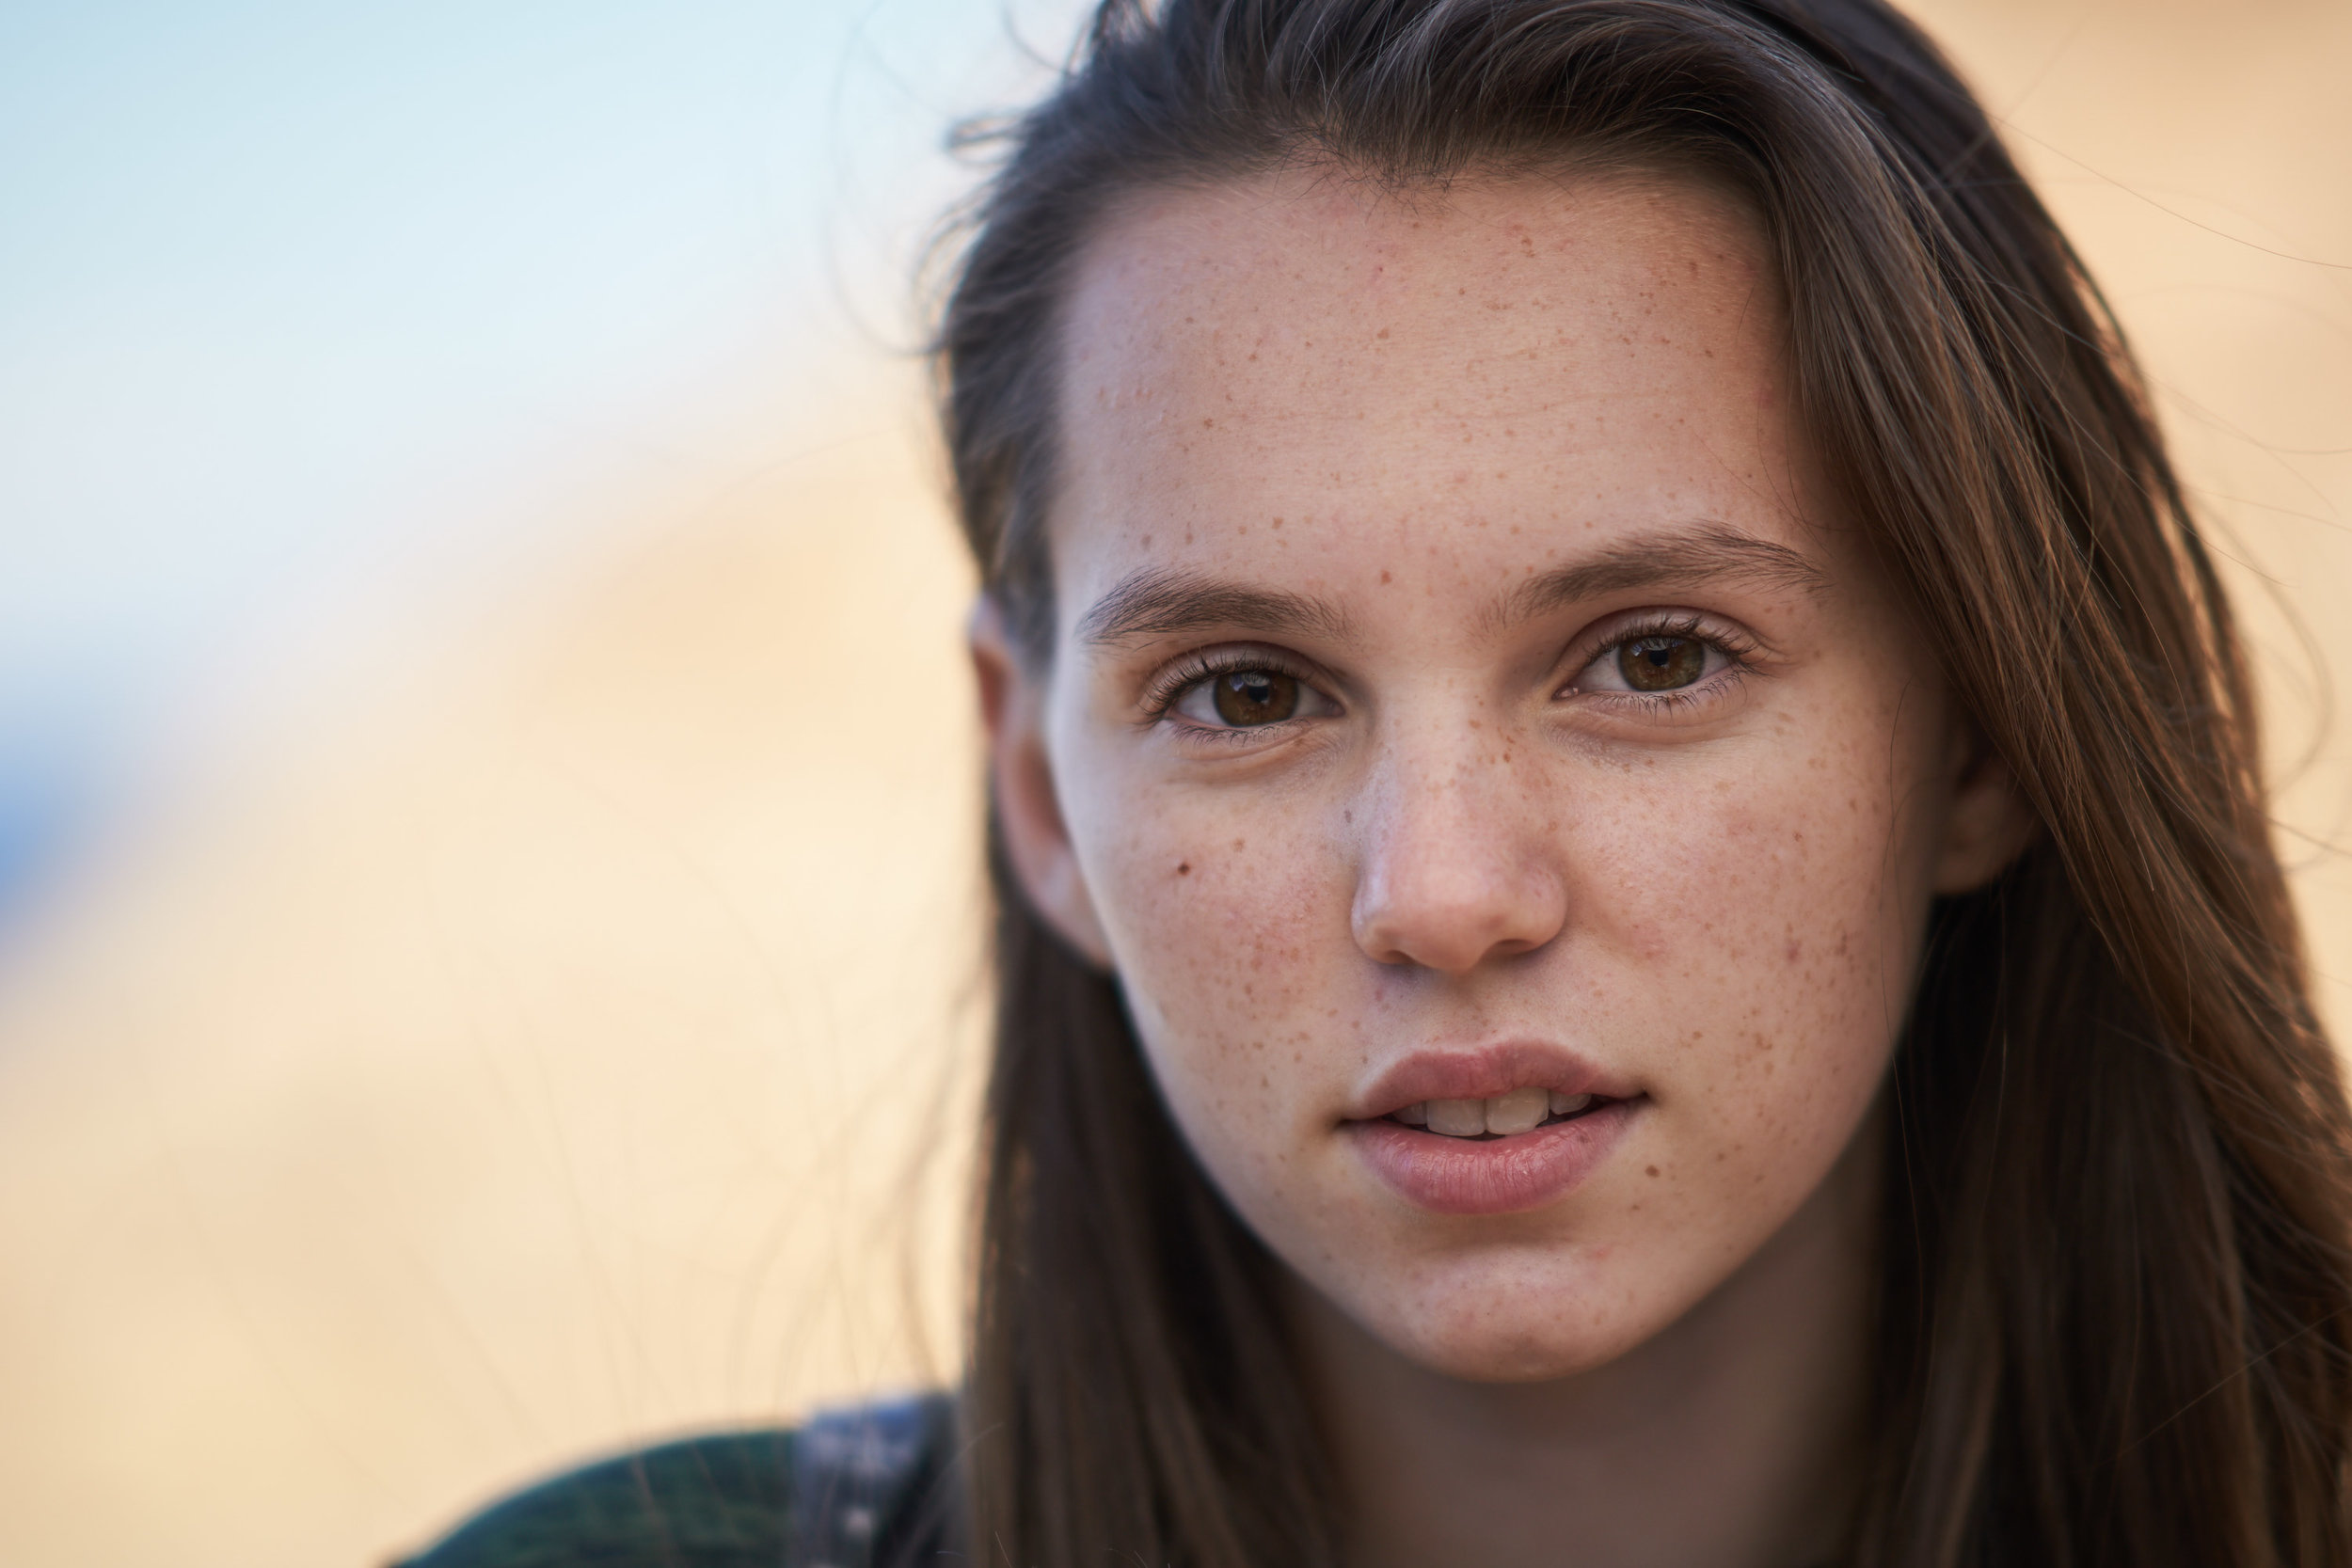
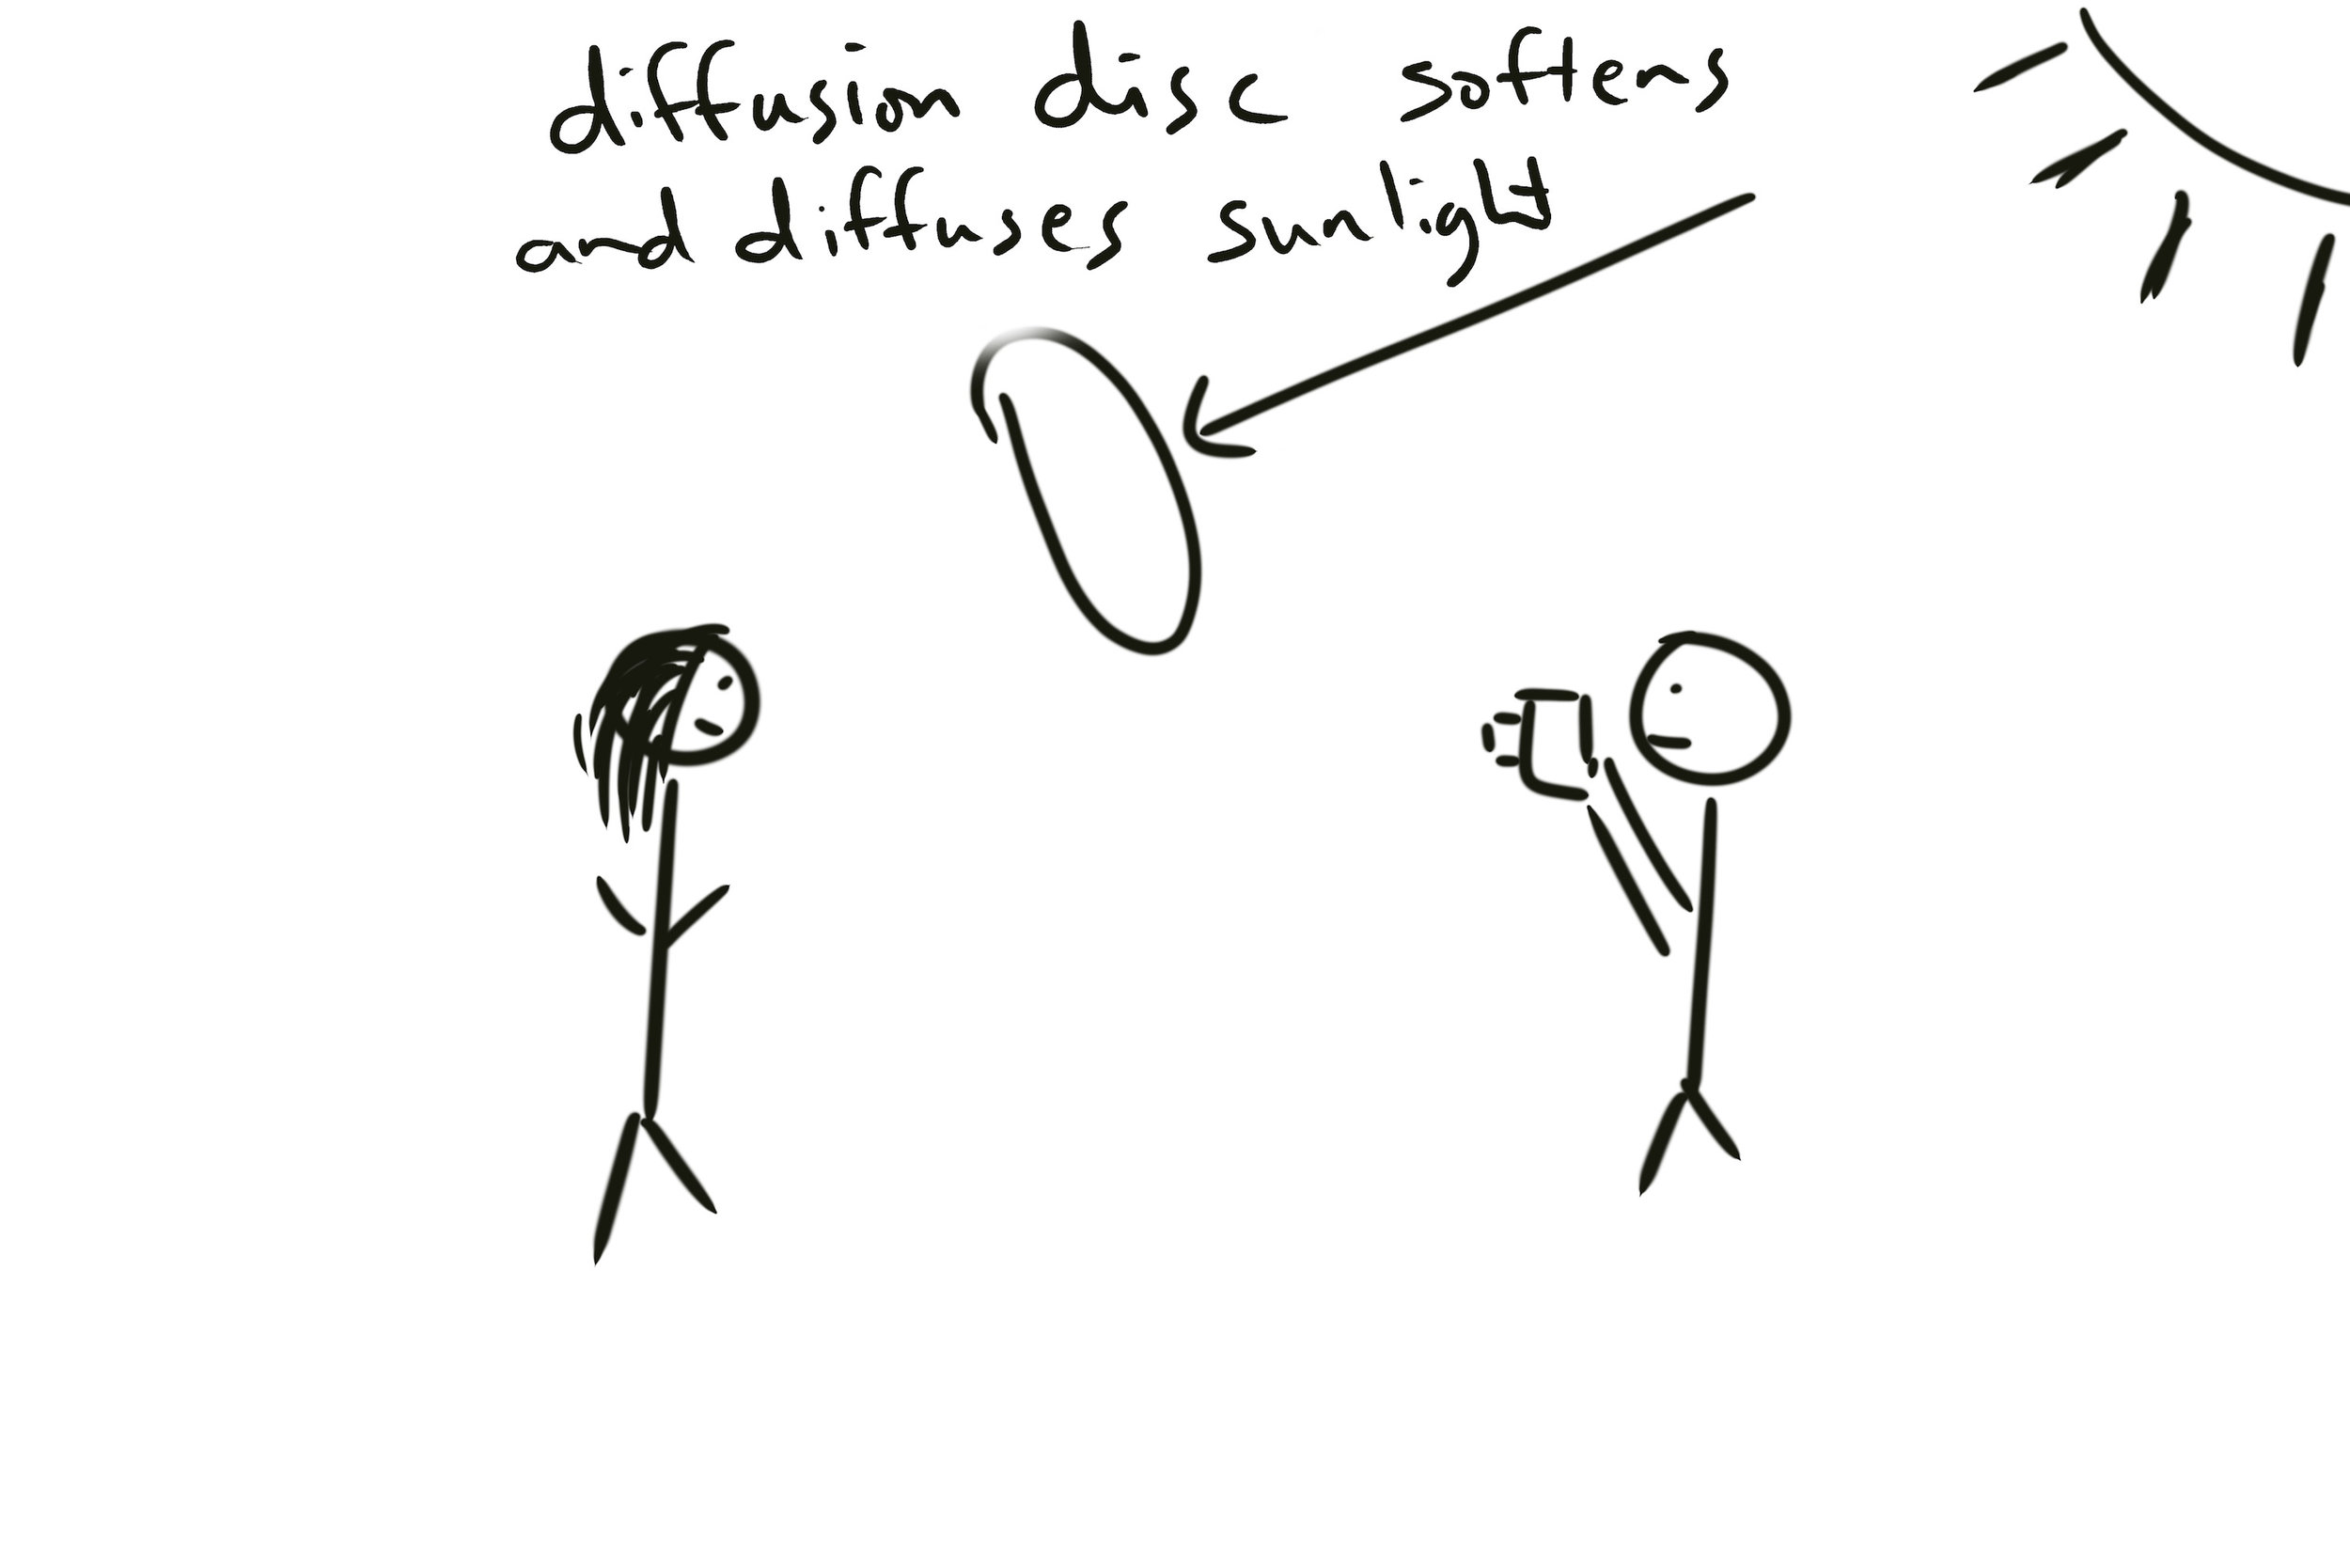
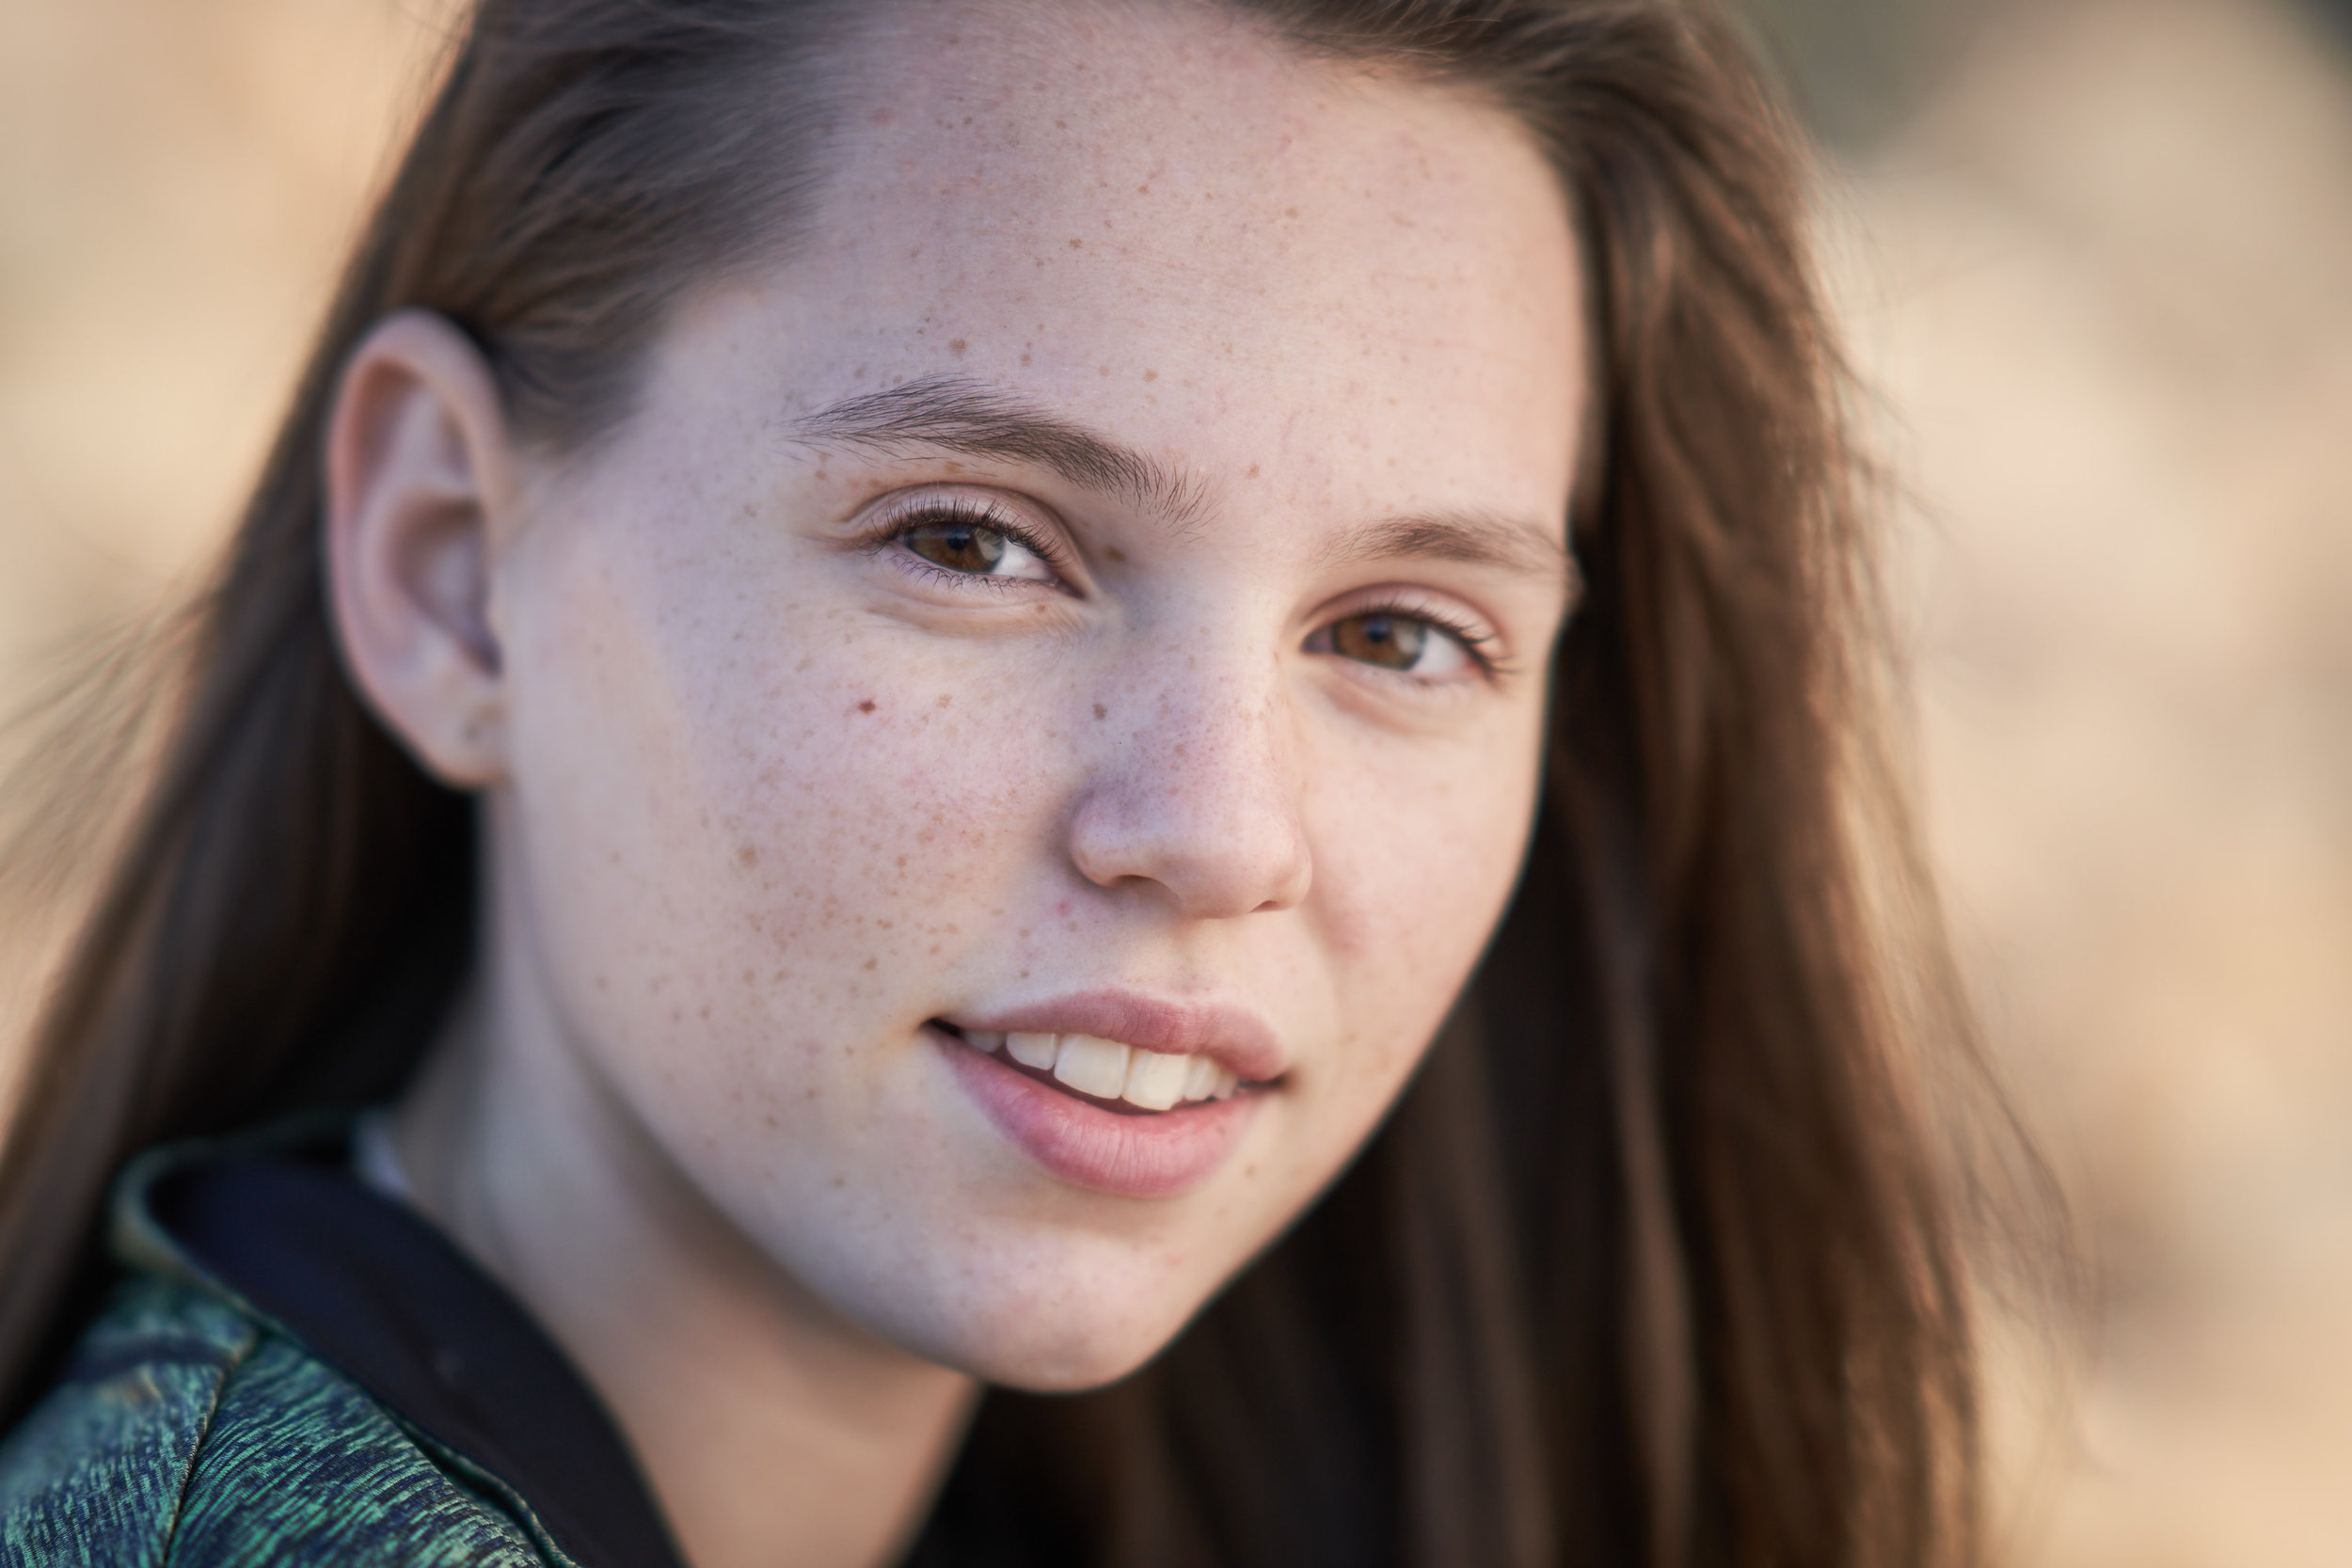
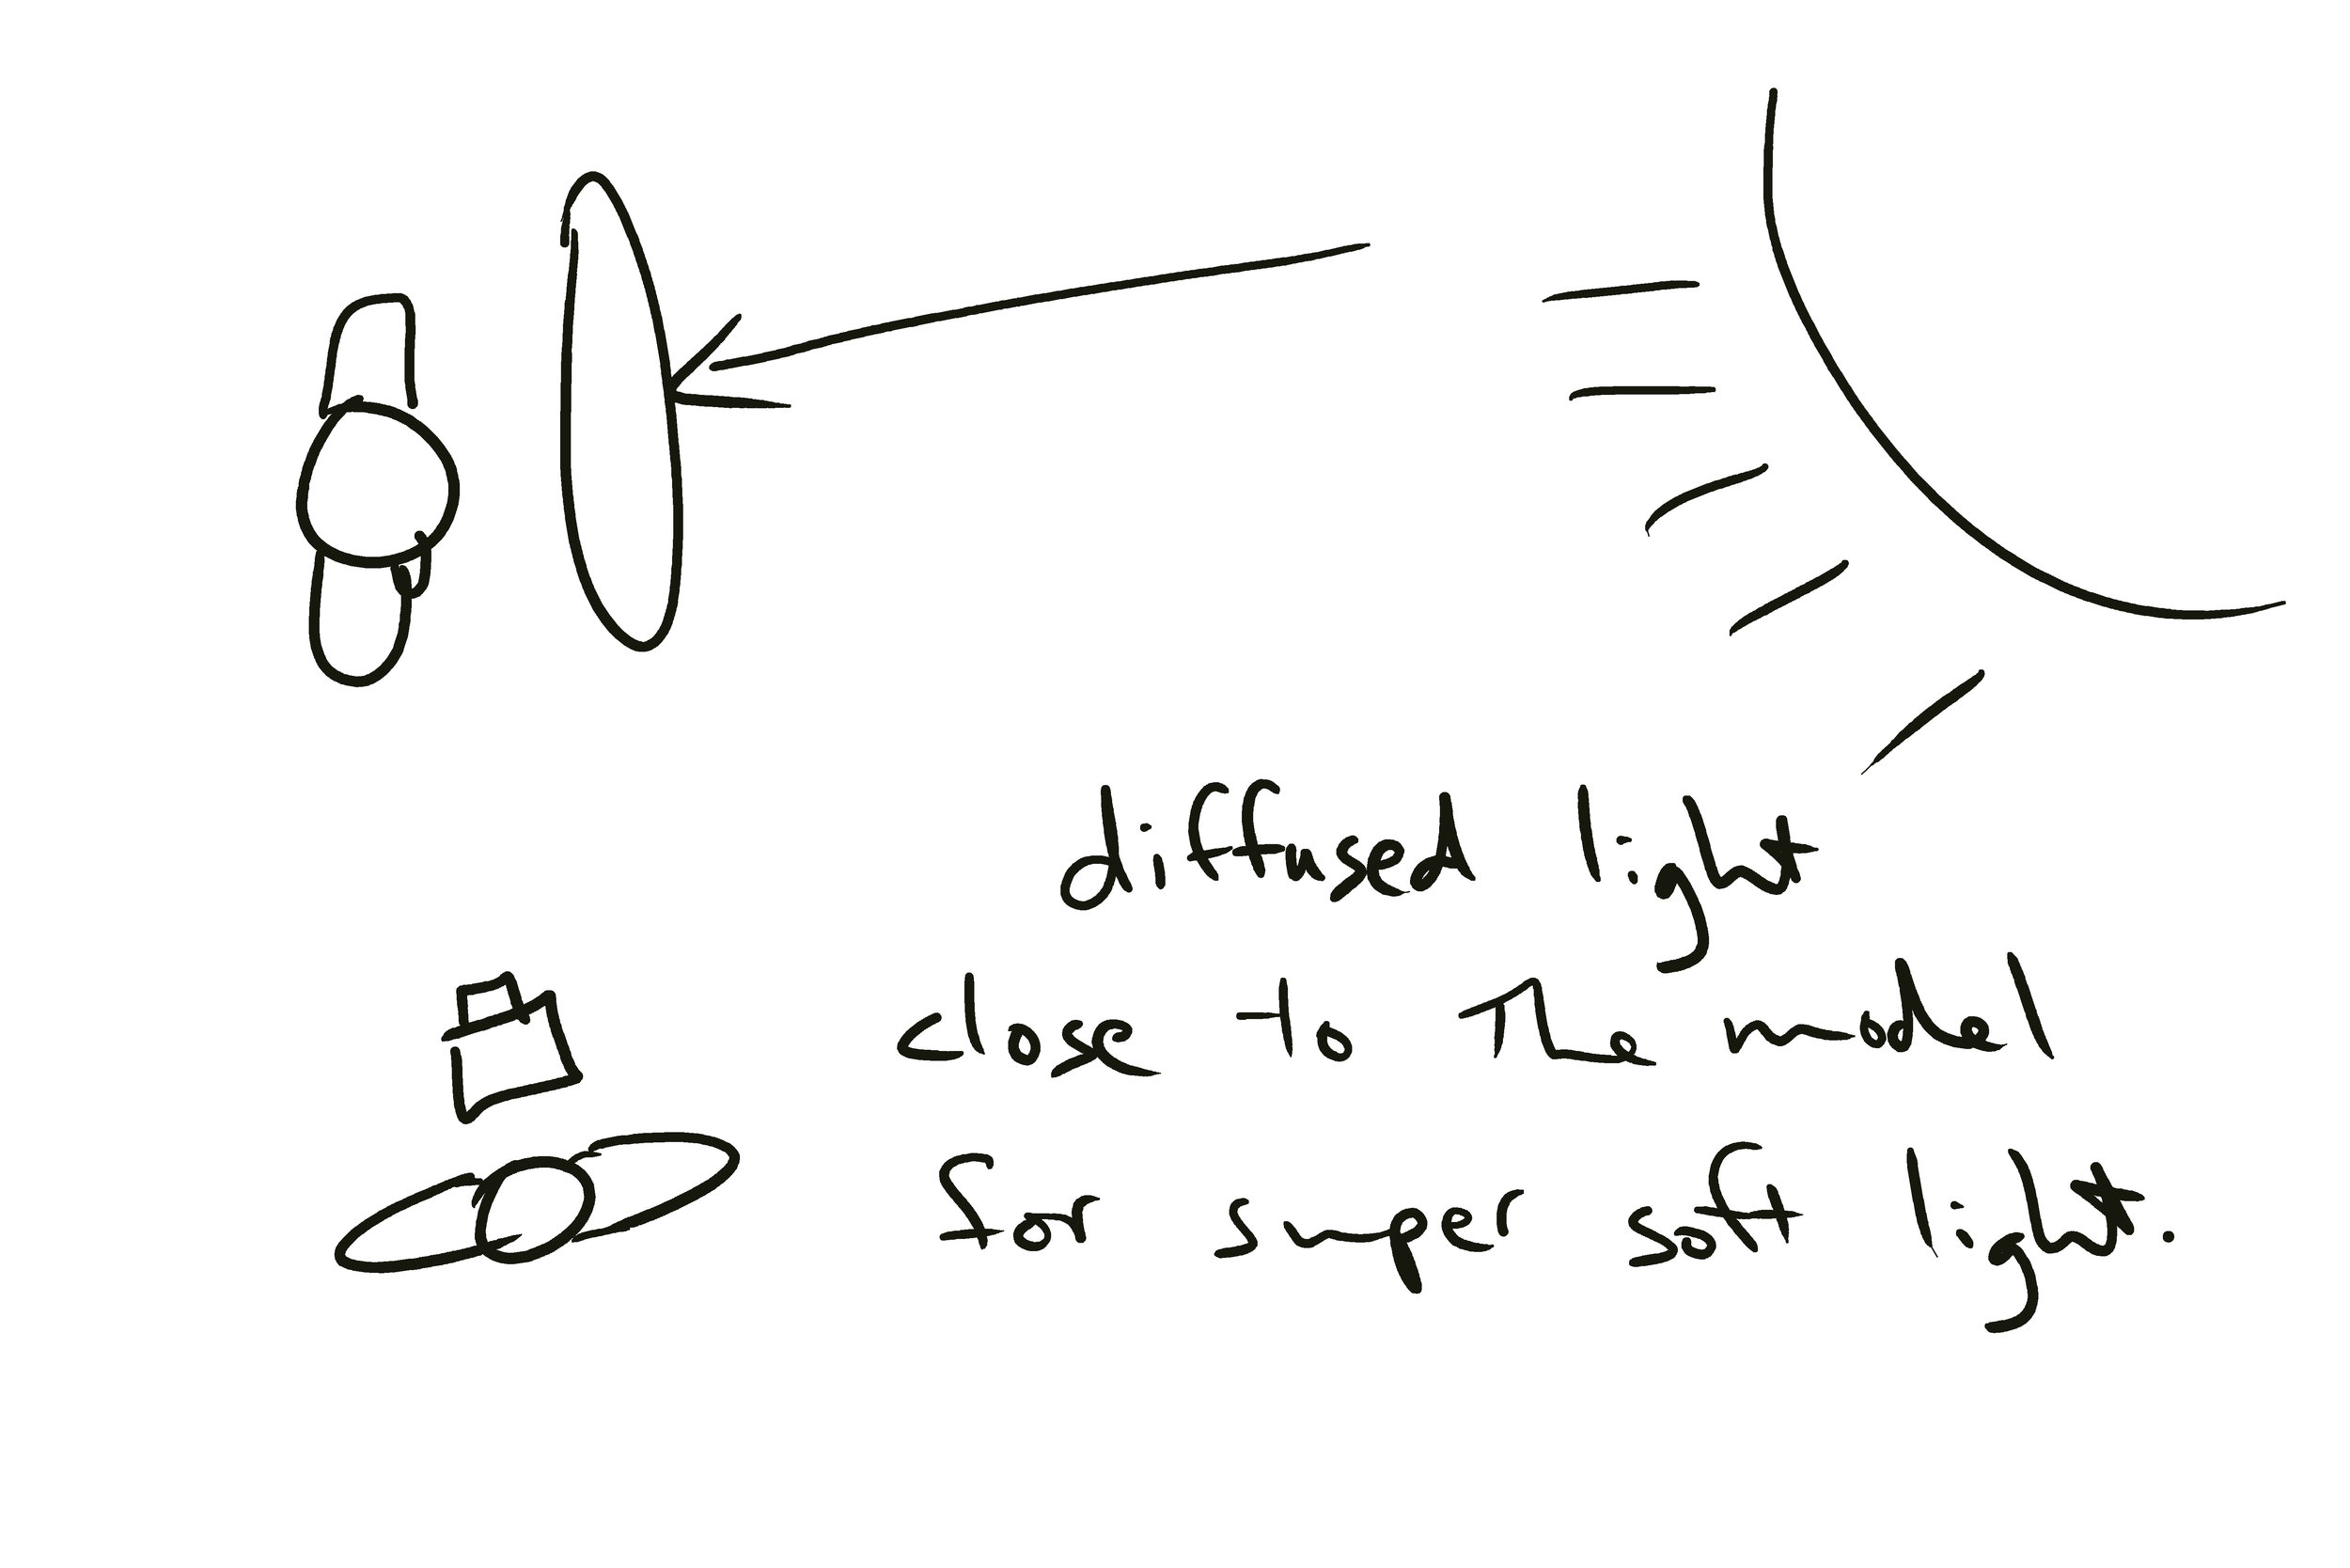
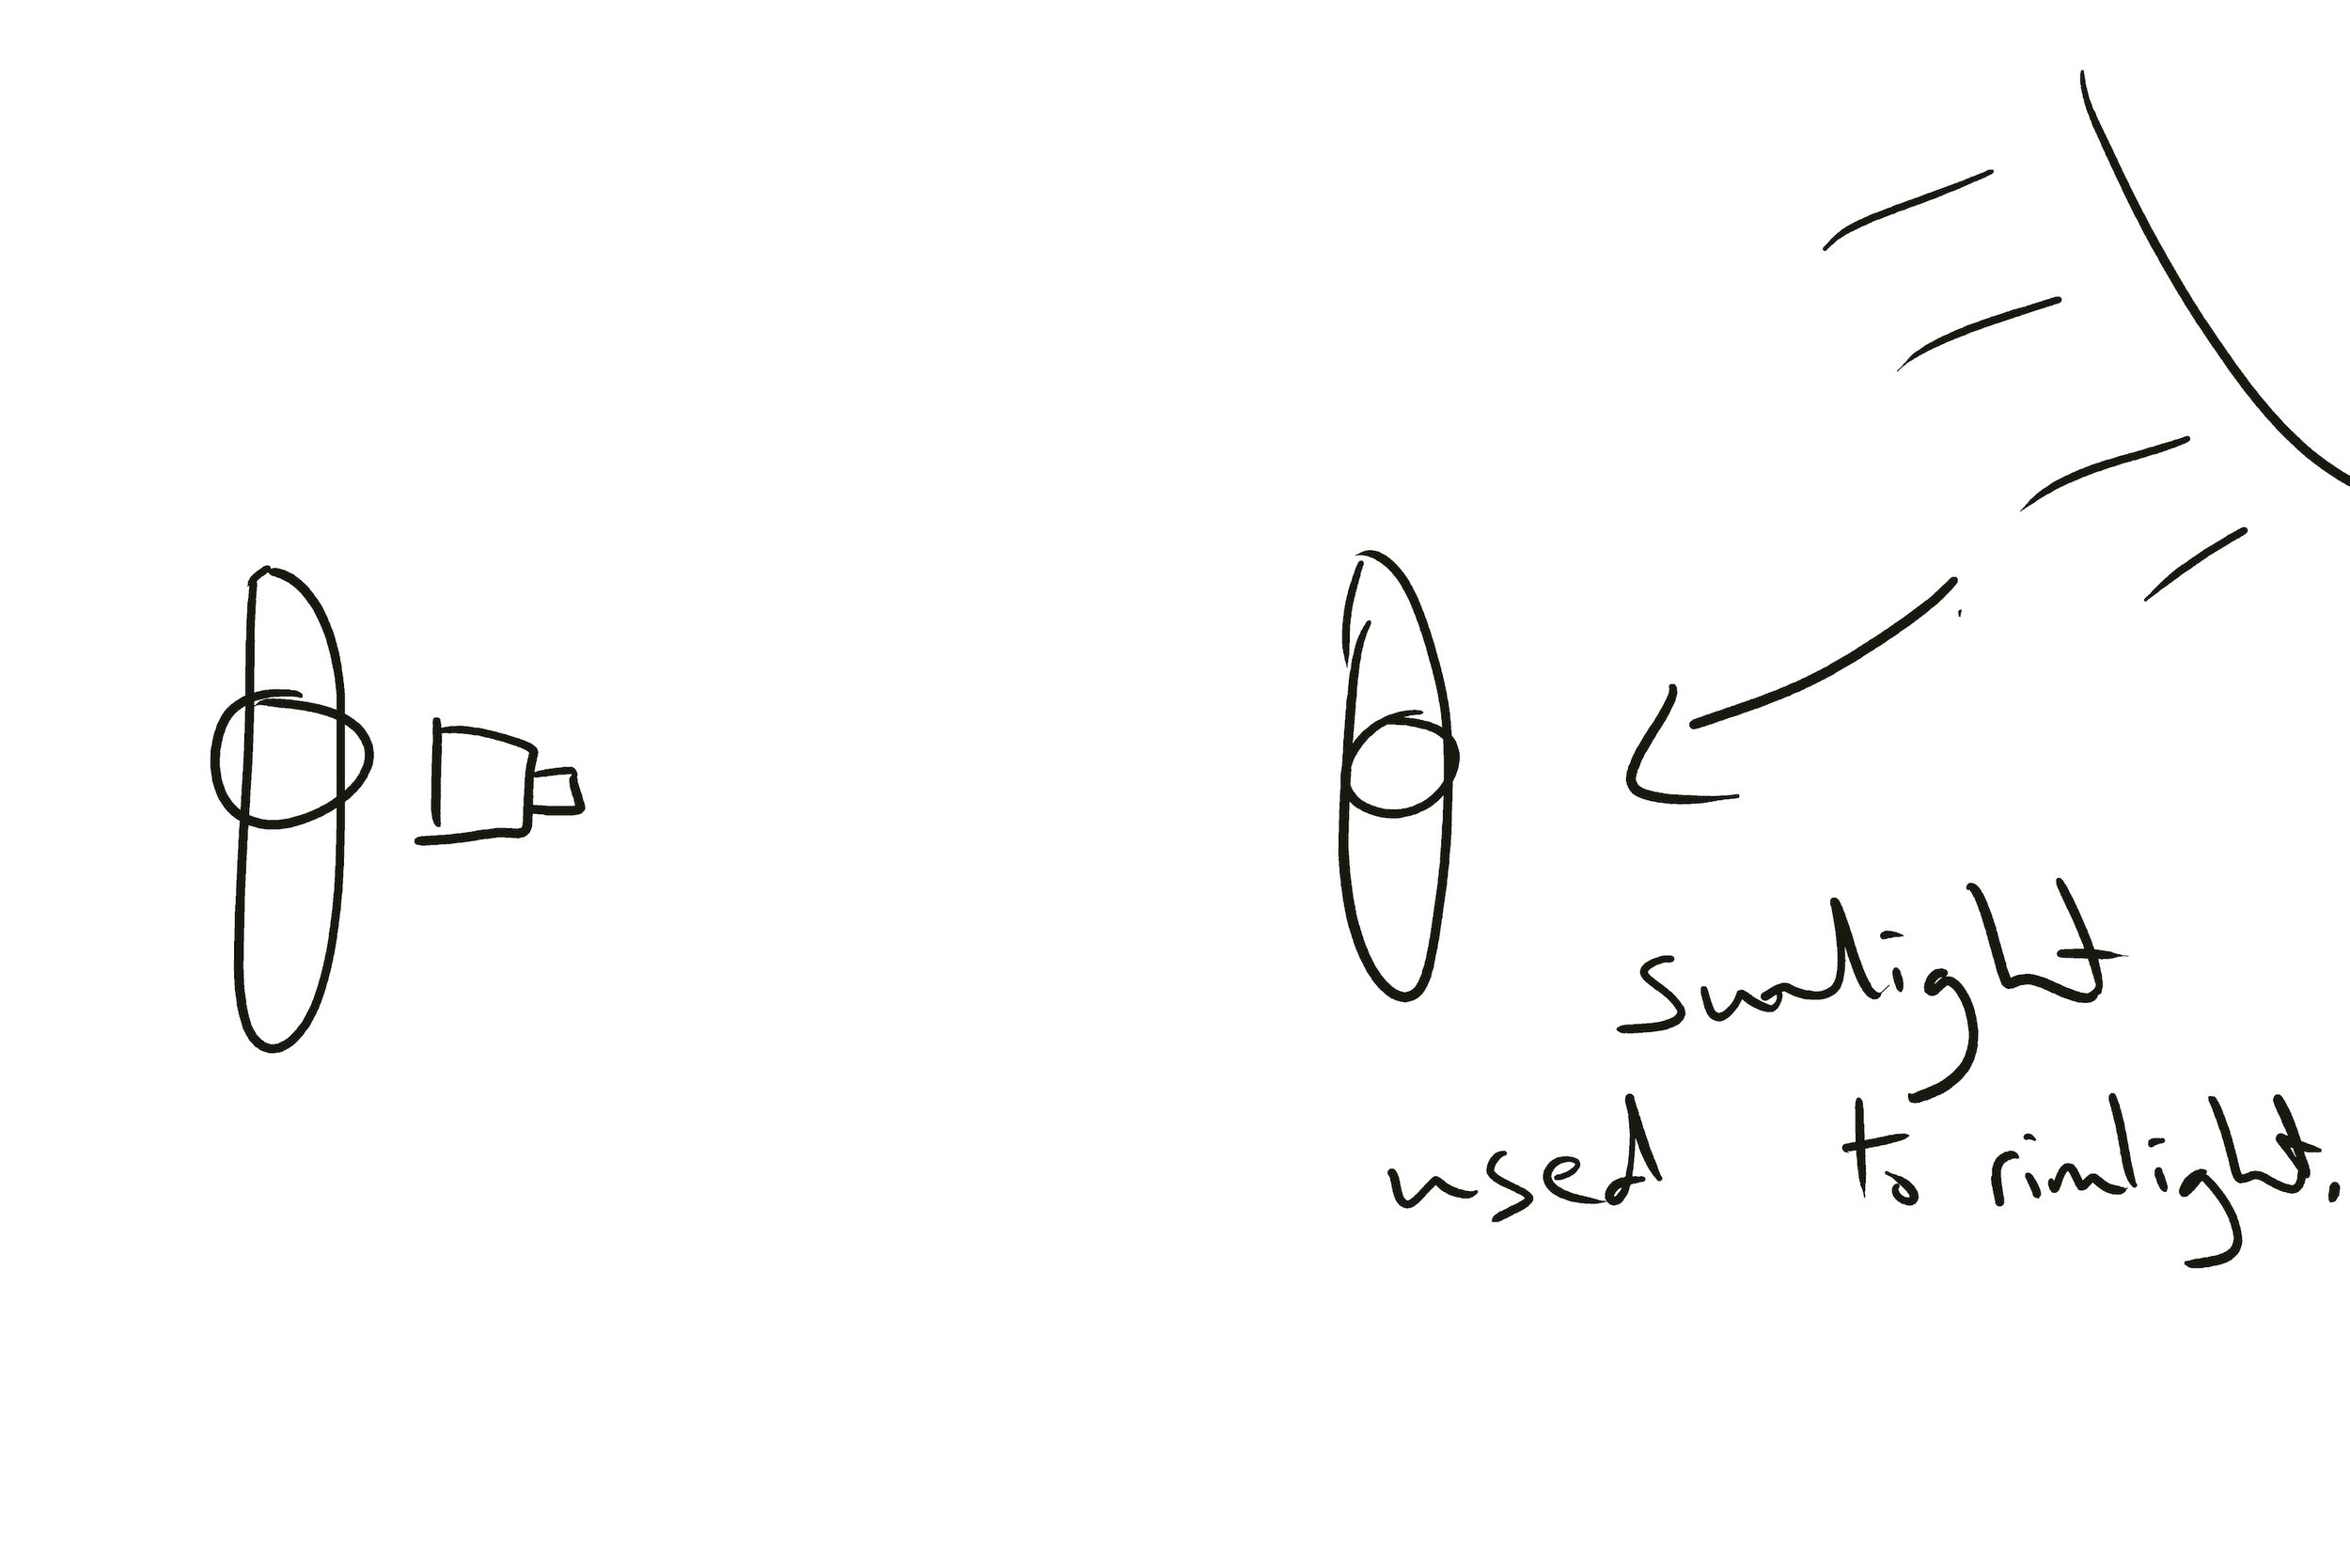
My second images is produced by using a simple diffusion disc. The light is still on axis with the camera and model. I had my assistant holding the diffusion disc just above the line of sight of the camera and pretty close to the model which knocks down the light enough and produces an incredibly soft and pleasant light on the model’s face while allowing for a natural and beautiful catchlight in the eyes. I love the simplicity of this image and the softness in her eyes. Both images were shot with the same 85mm lens at f1.4. The second image has so much bright sky behind the model that it actually produces a great rim light on her cheek. Awesome!
For the third image I had my assistant bring the diffuser close to the model’s face, just out of the view of the camera. Then the model turned, only her head, to her right and looked into camera. The model did not move her body position compared to the sun or the diffuser, only turning her head to look at me as I had changed my position. This image provides us a bit of cross lighting but still incredibly soft light because the closeness of the light source (the meter diameter diffuser is less than a foot away from her face. Remember... the larger the apparent size of the light source to your subject, the softer the light will be. So by putting the light source this close we will have an incredibly soft light, even though the harsh sun is truly our original light source.)
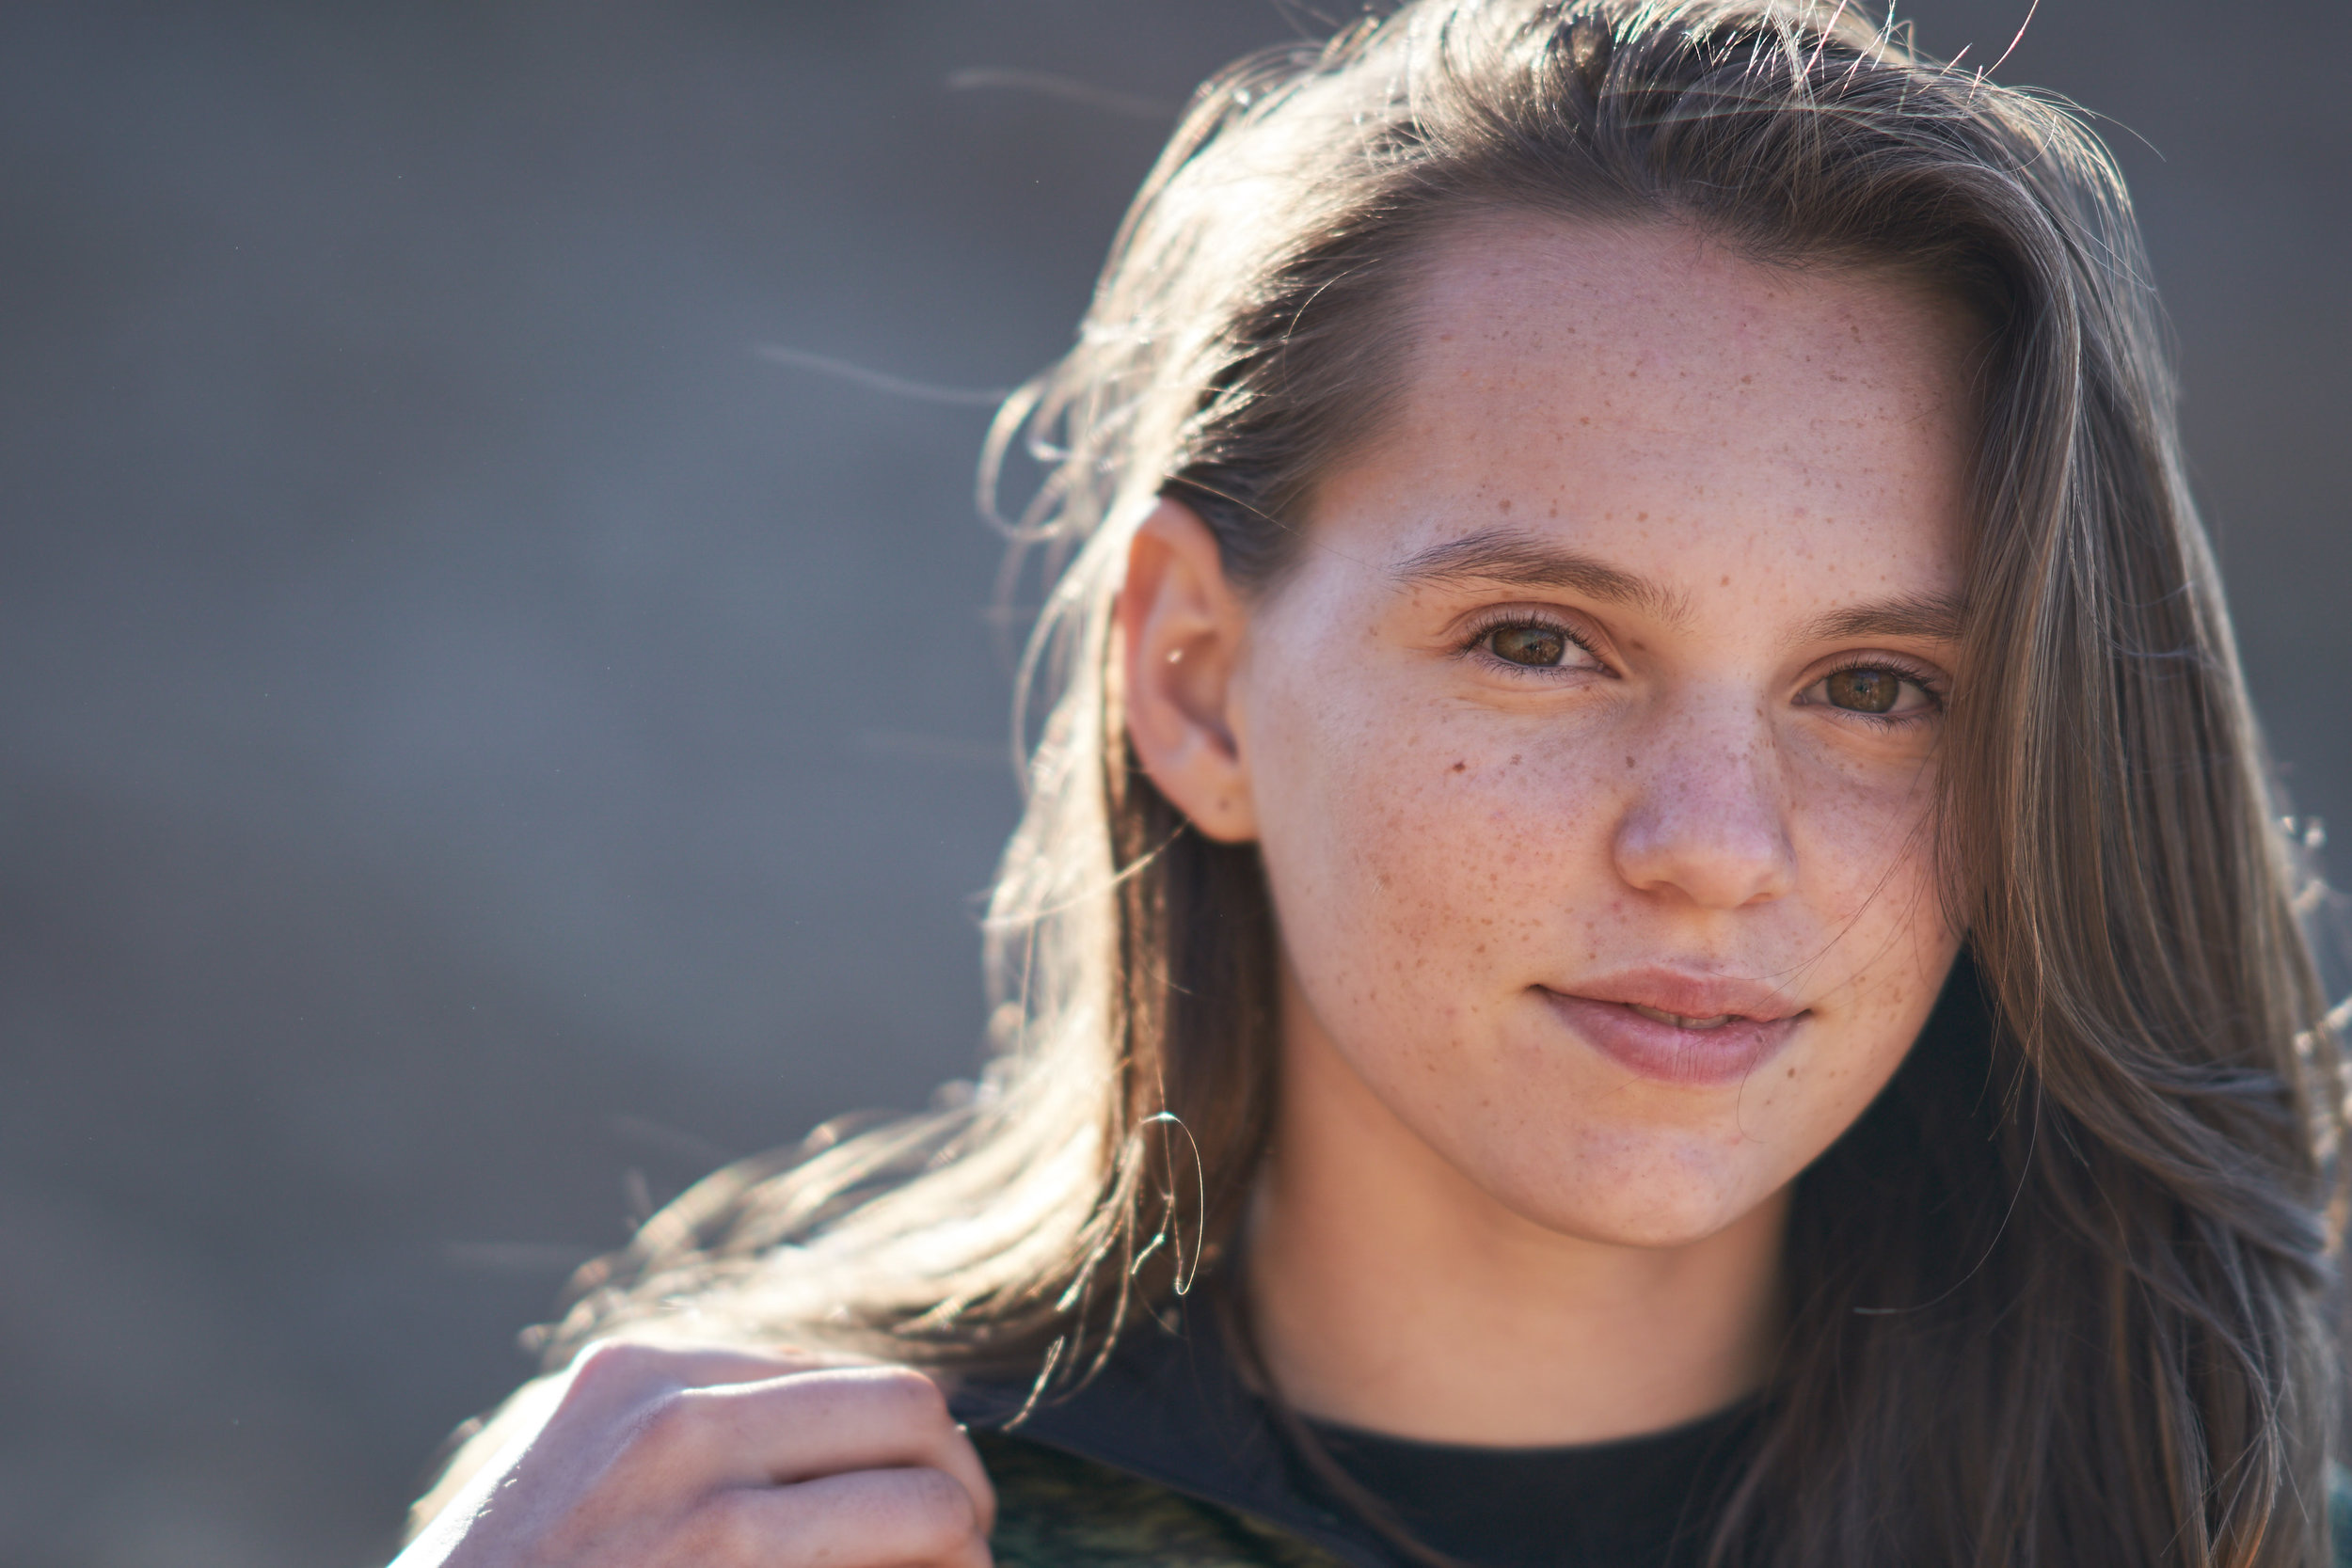
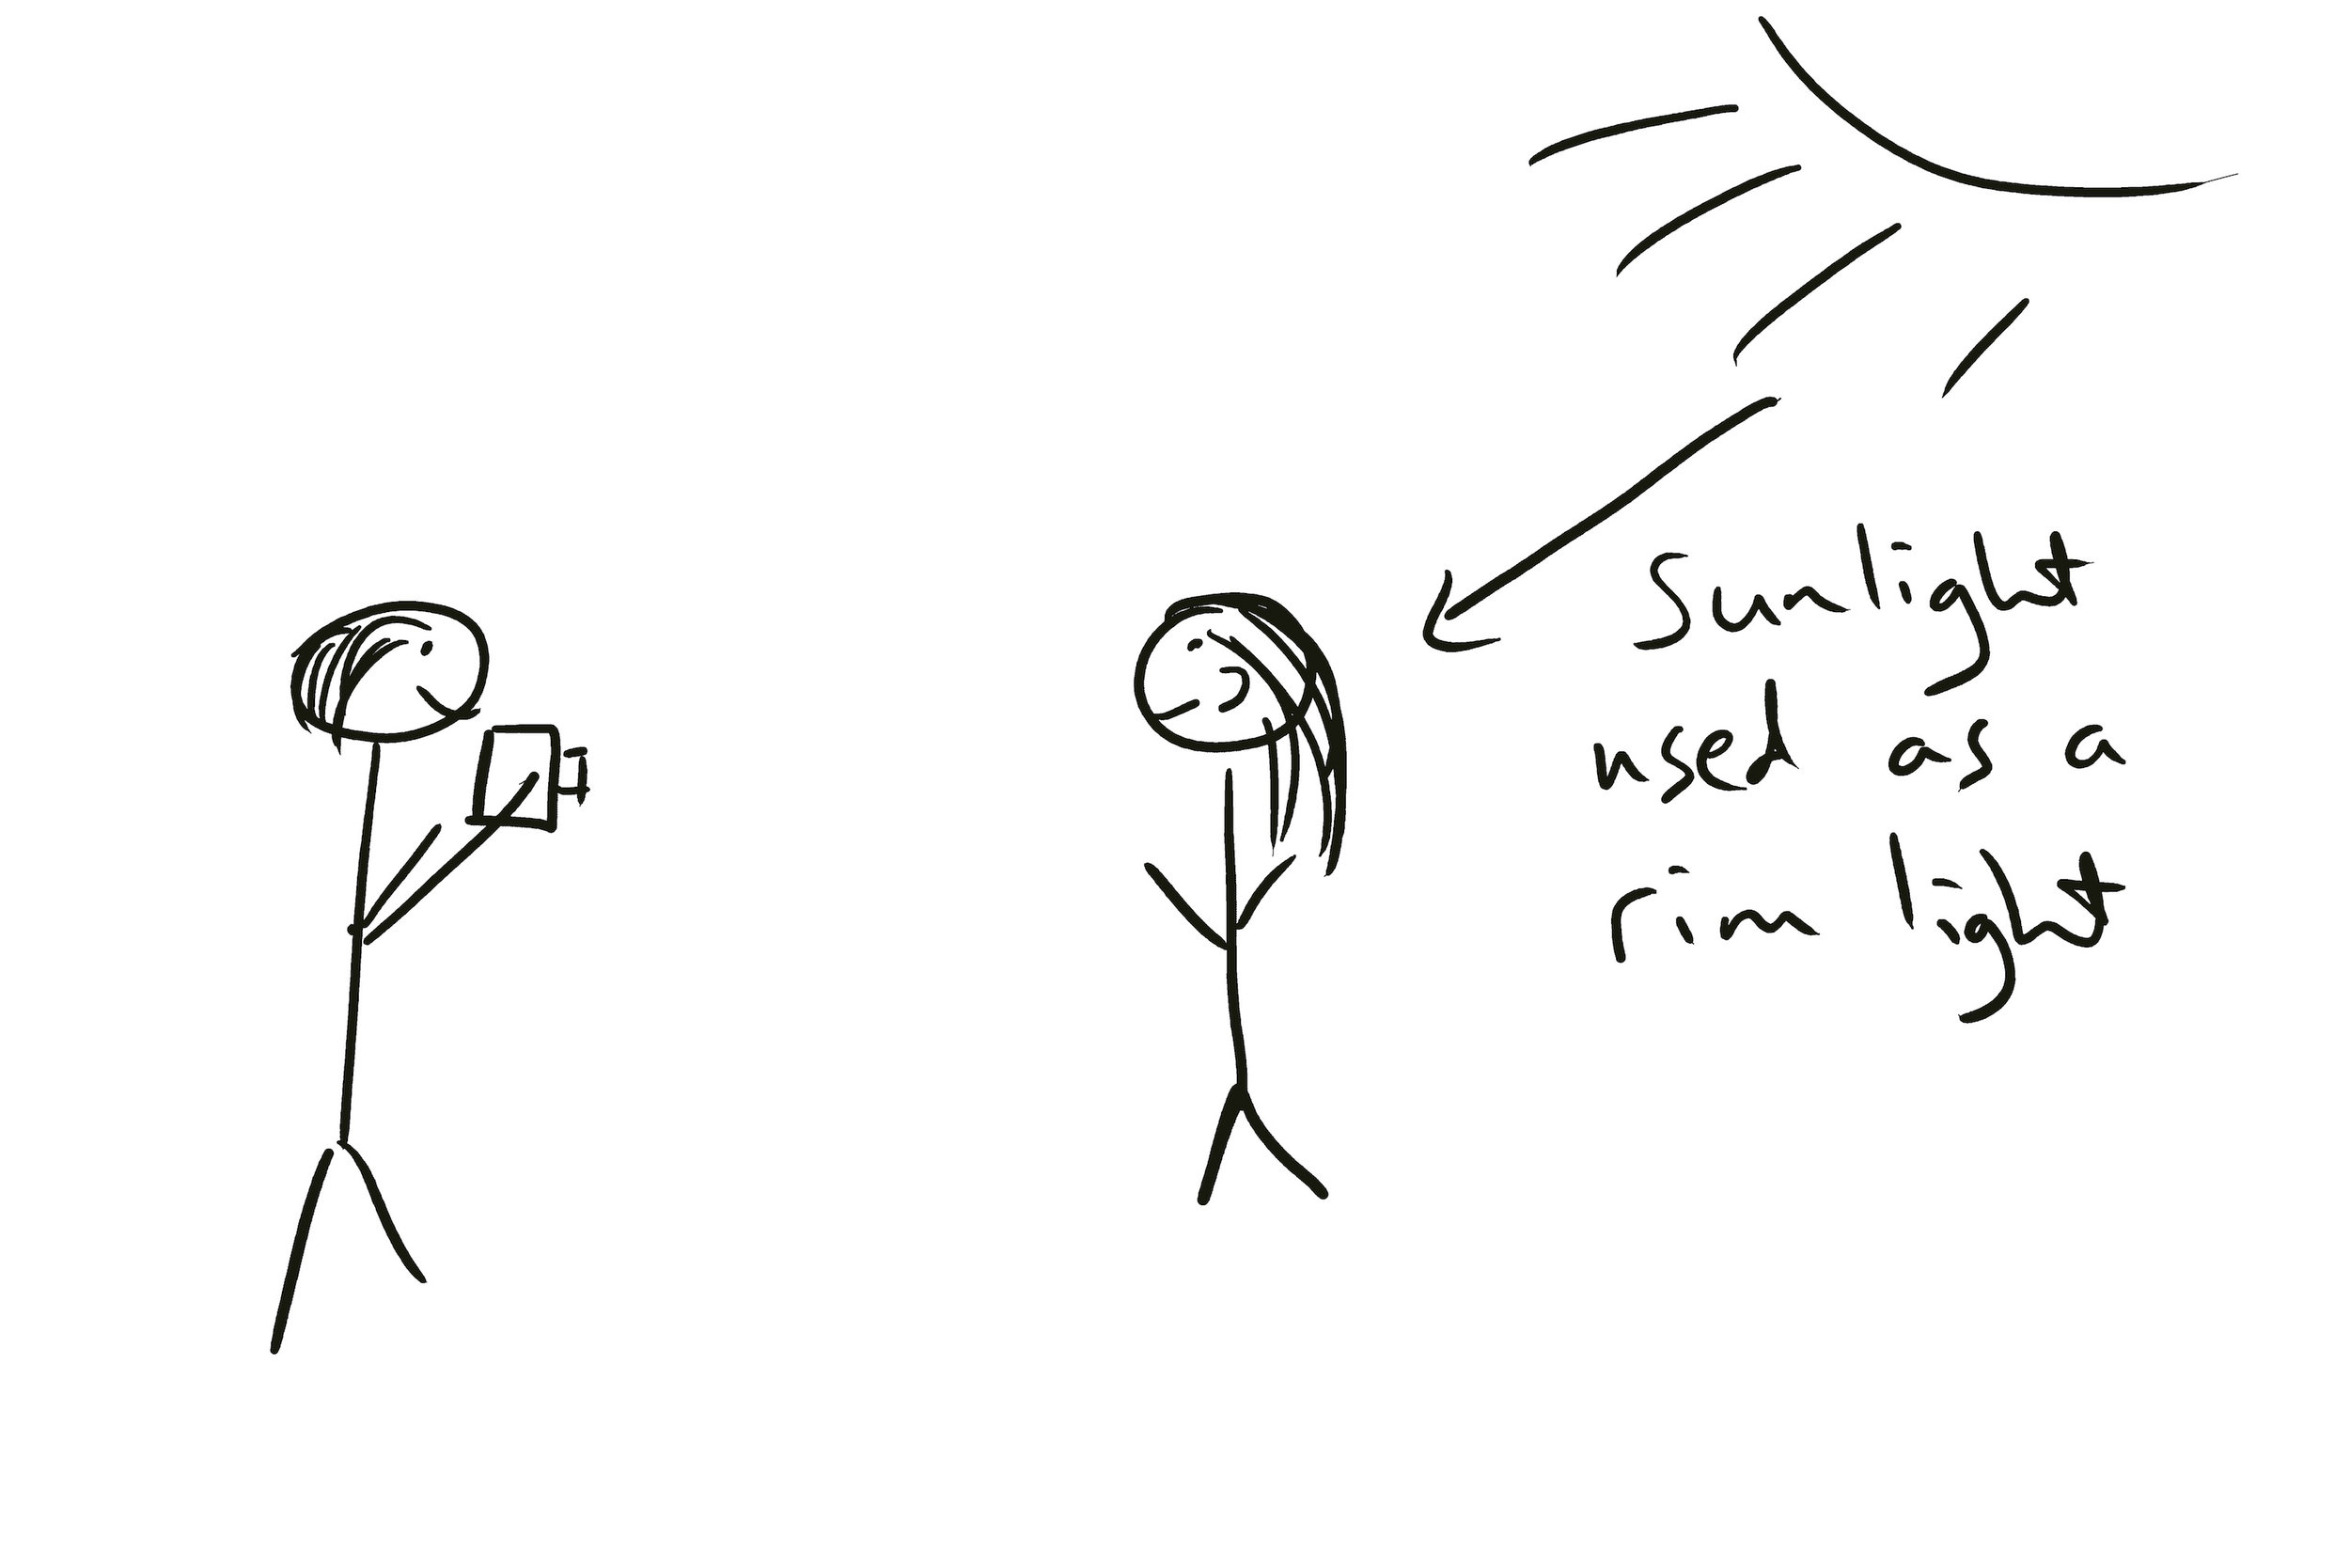
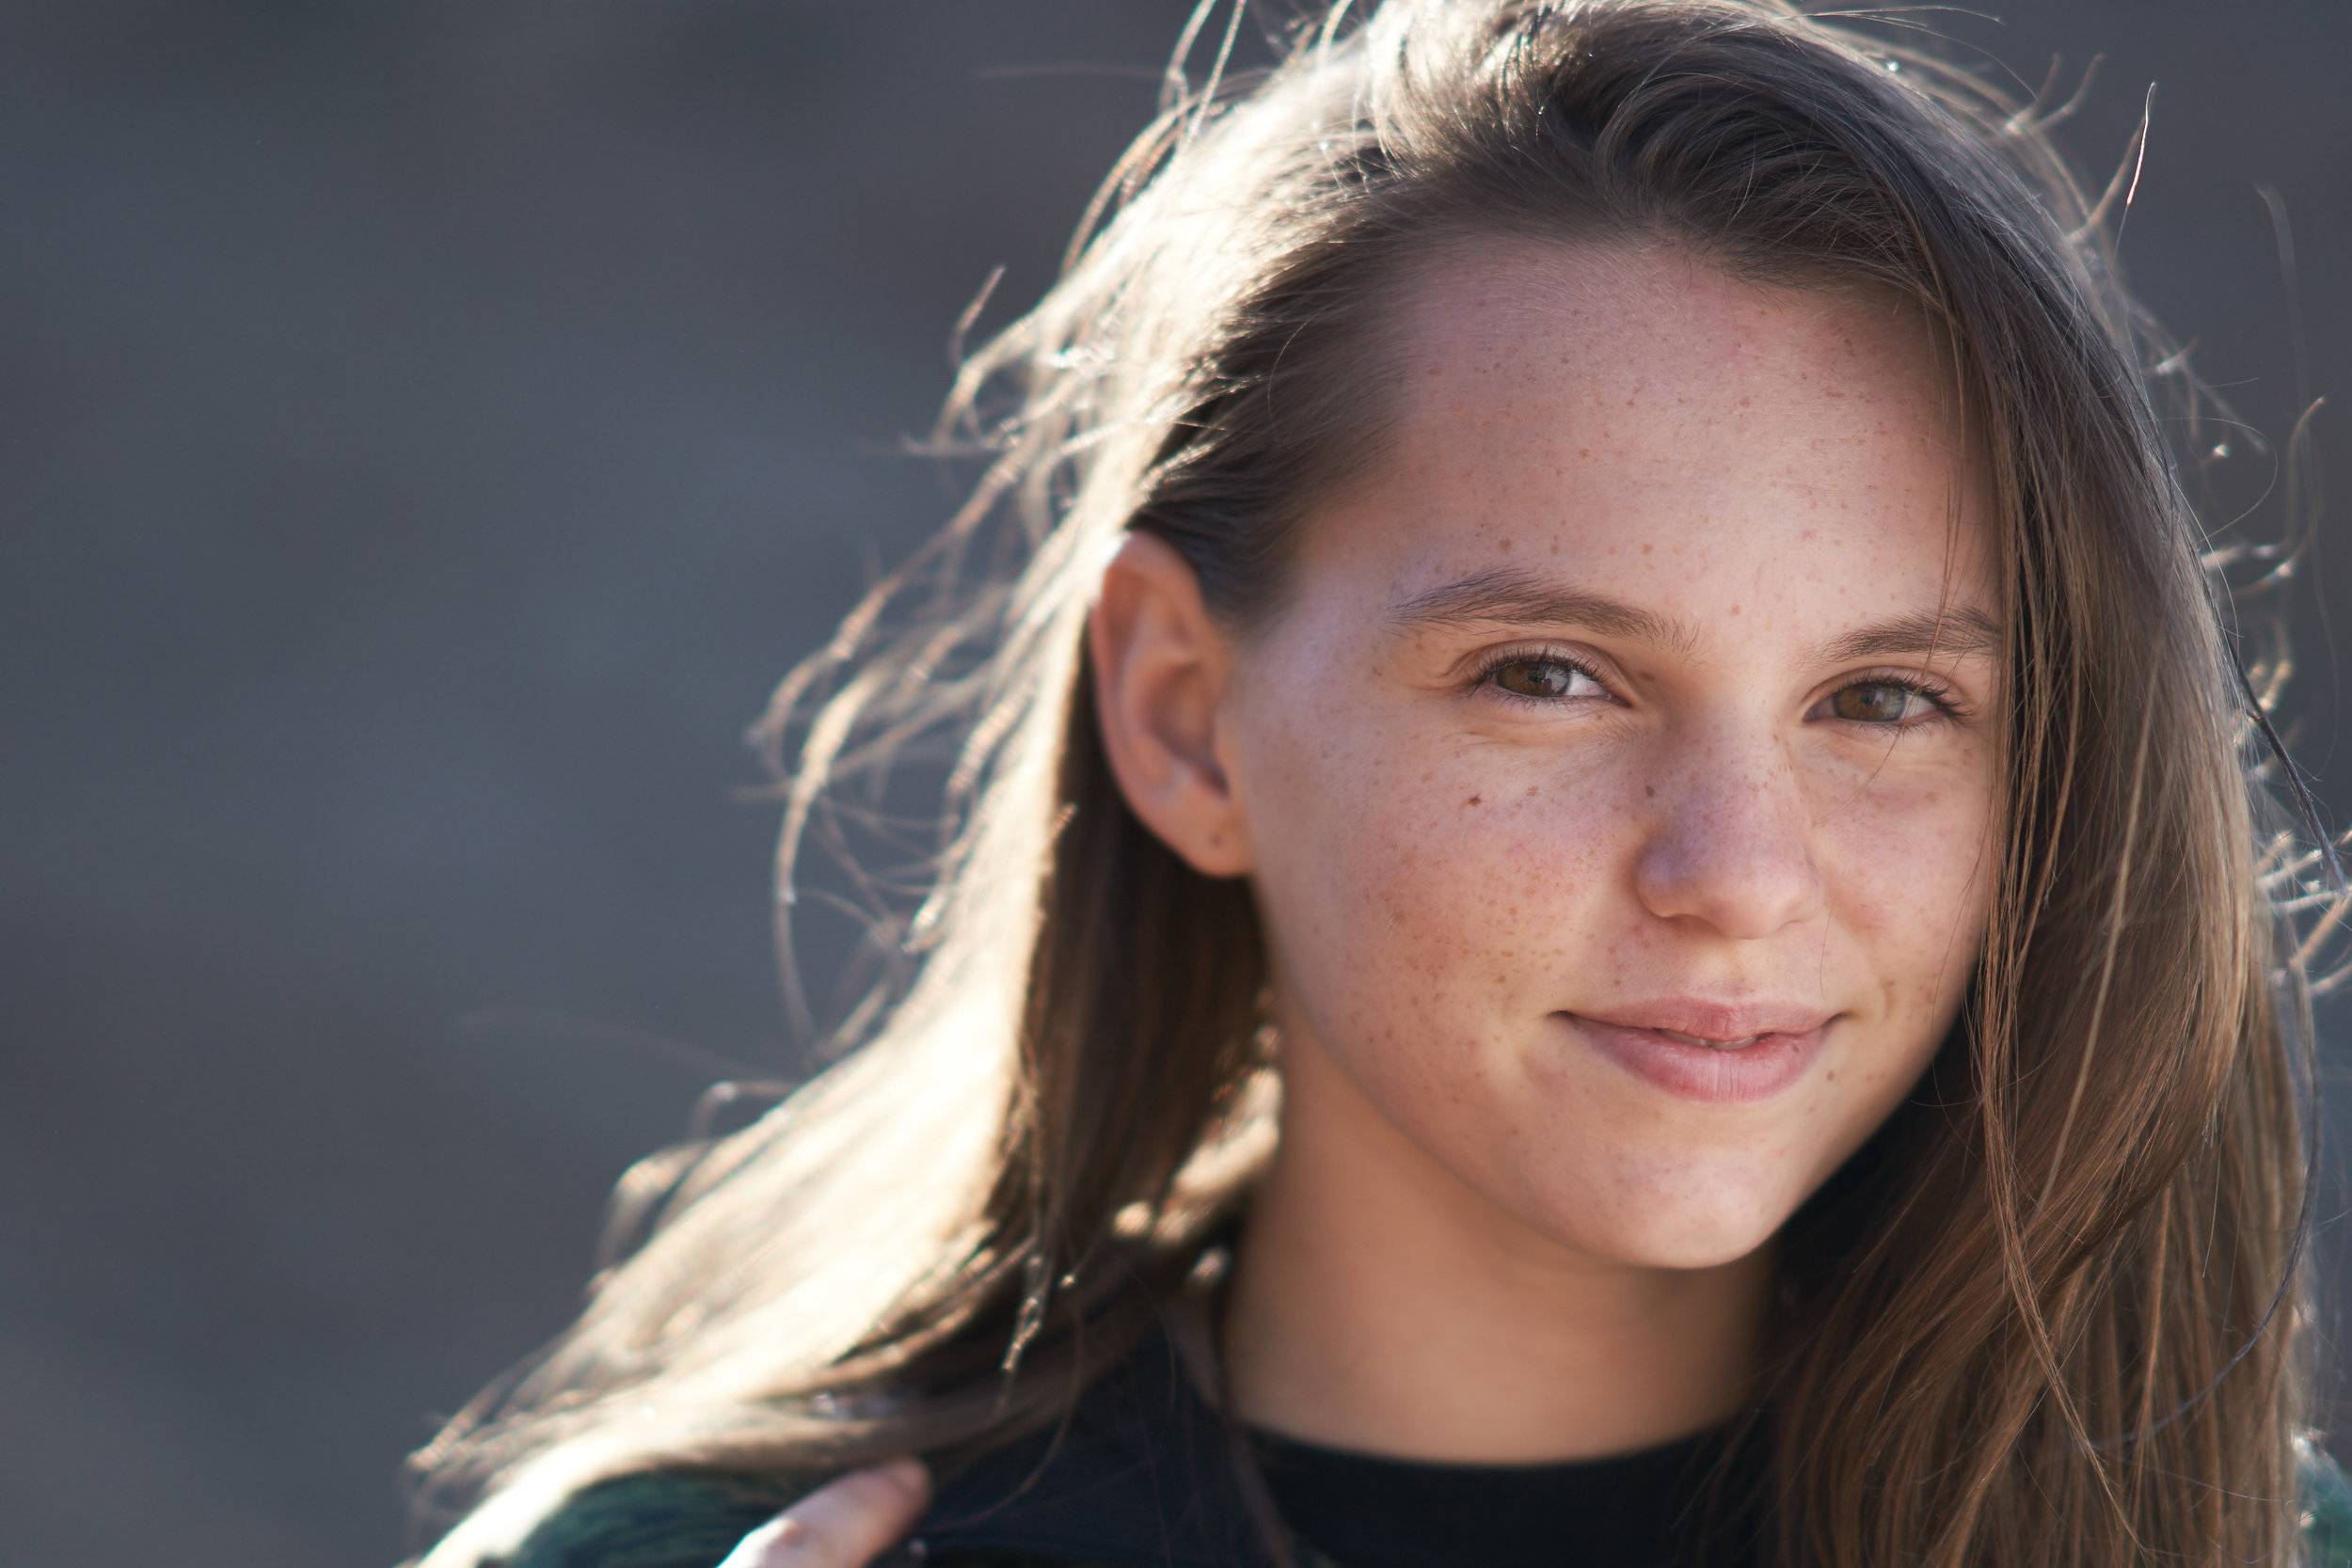
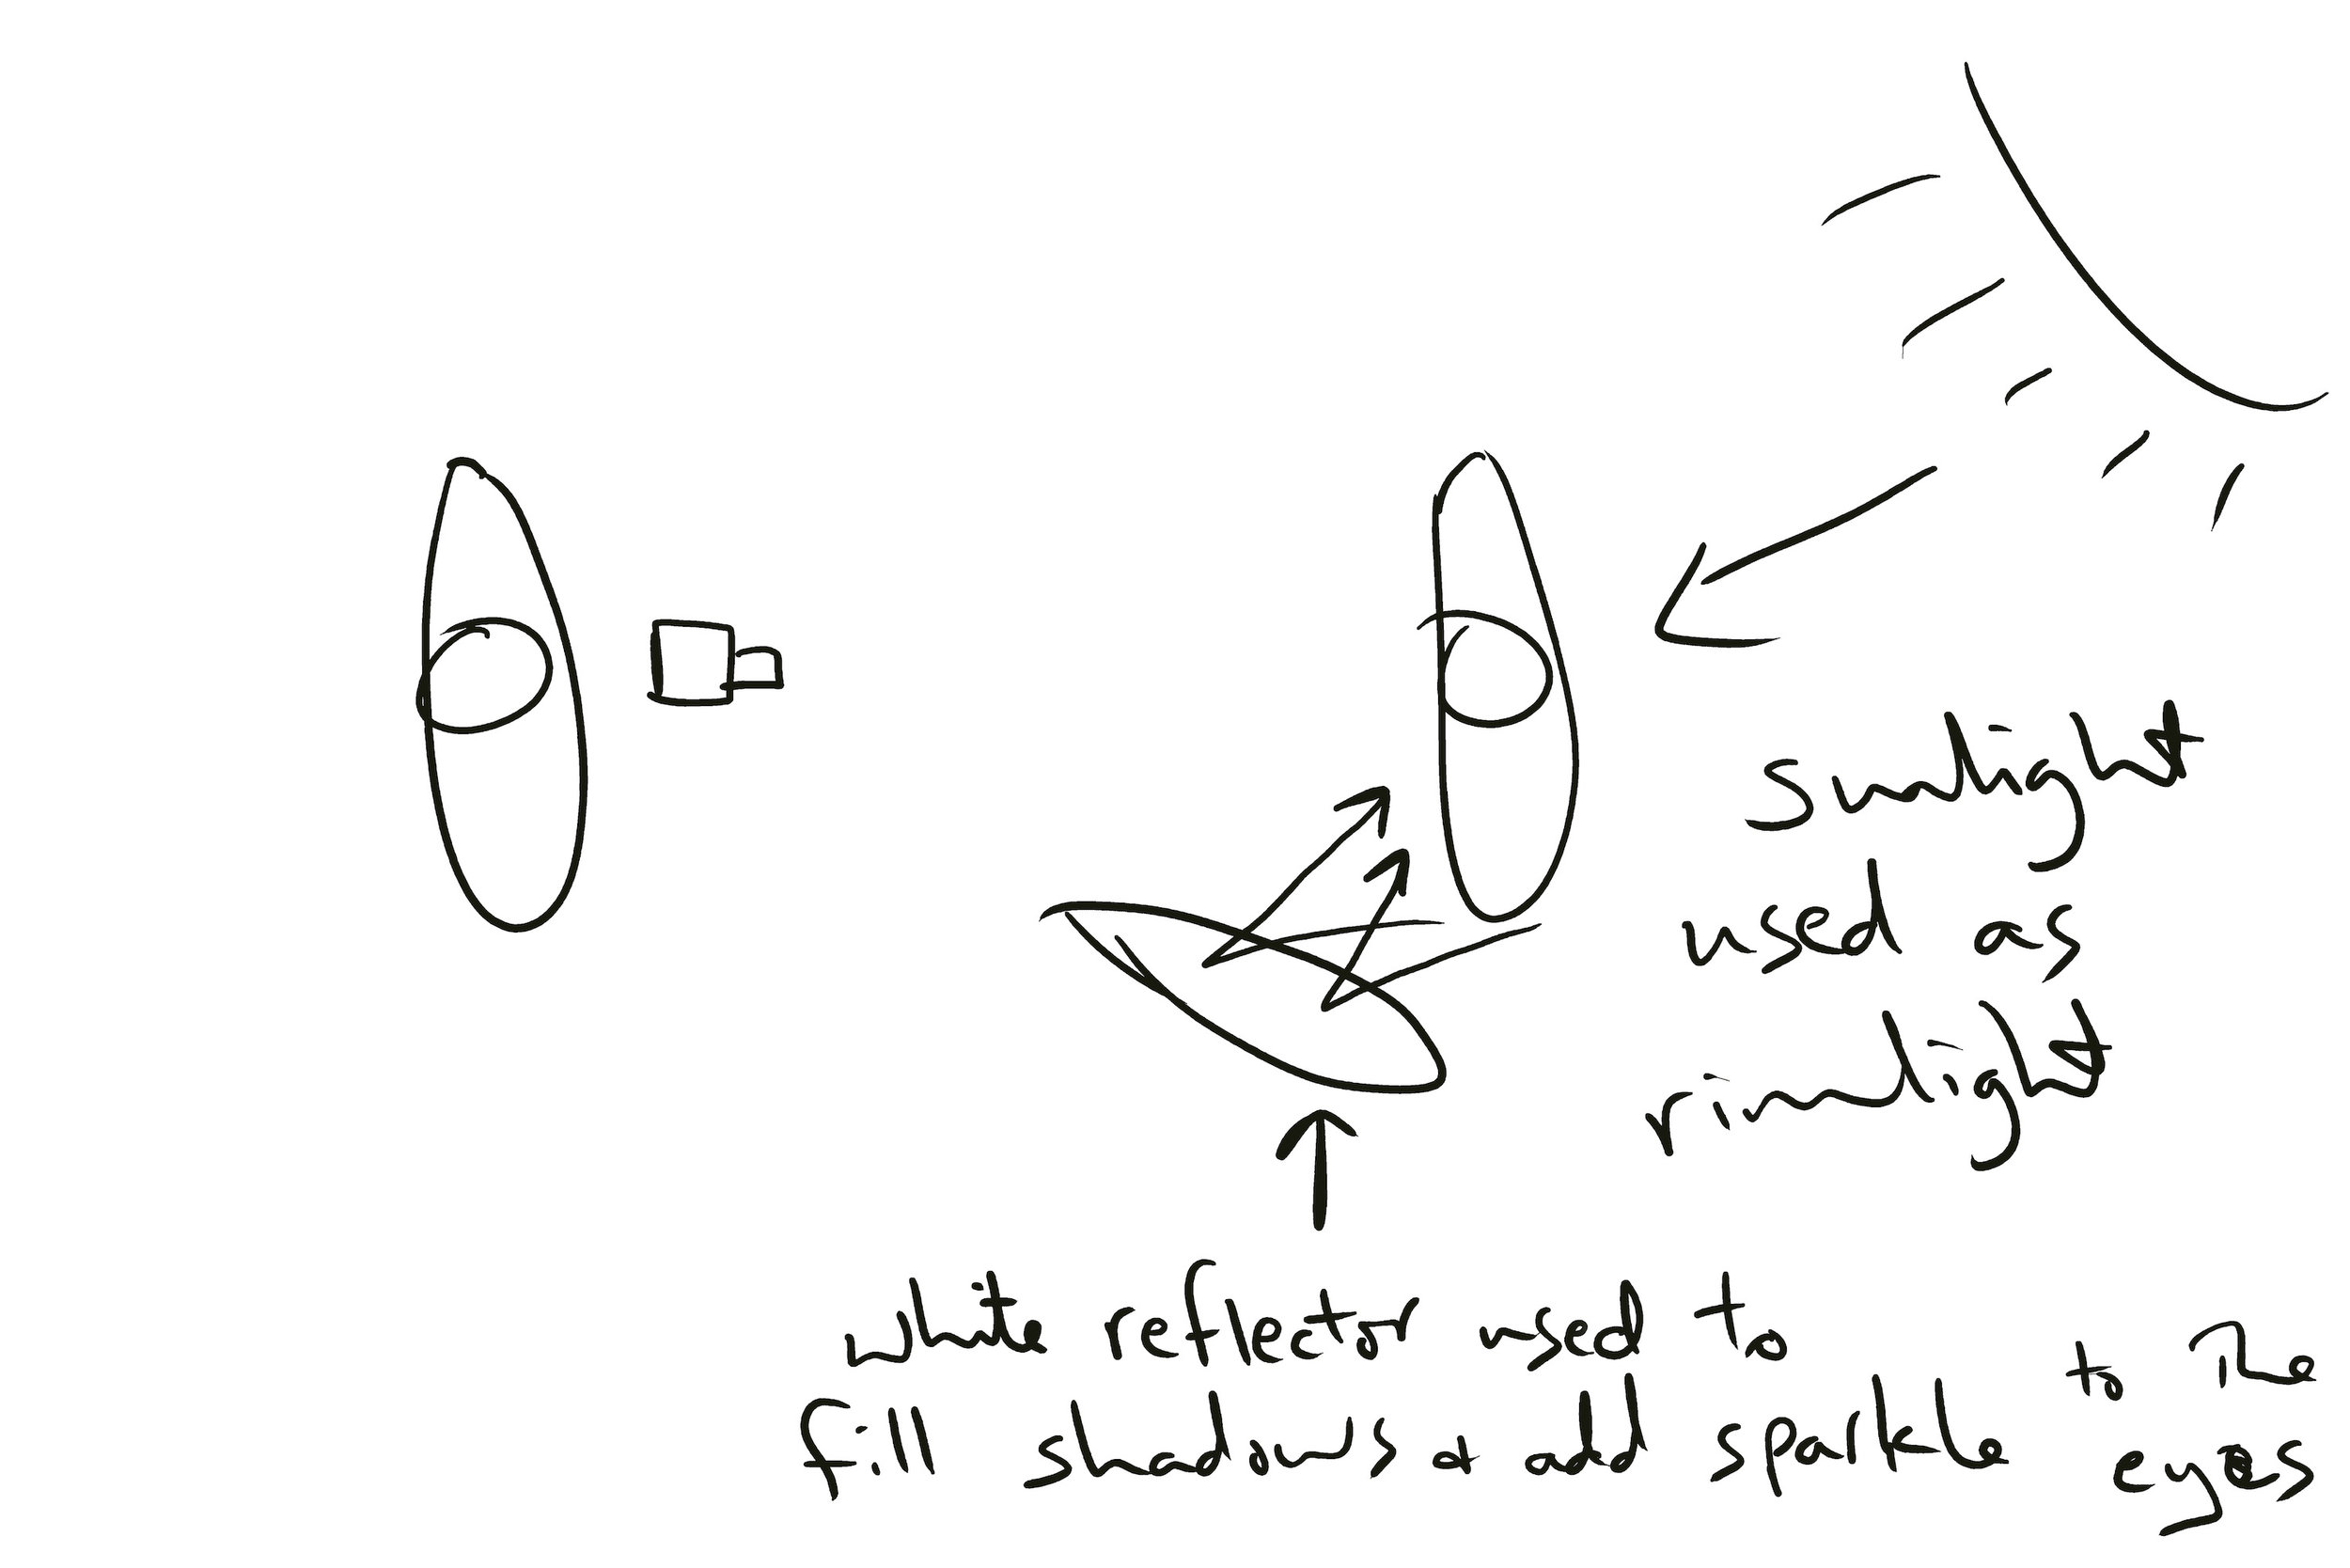
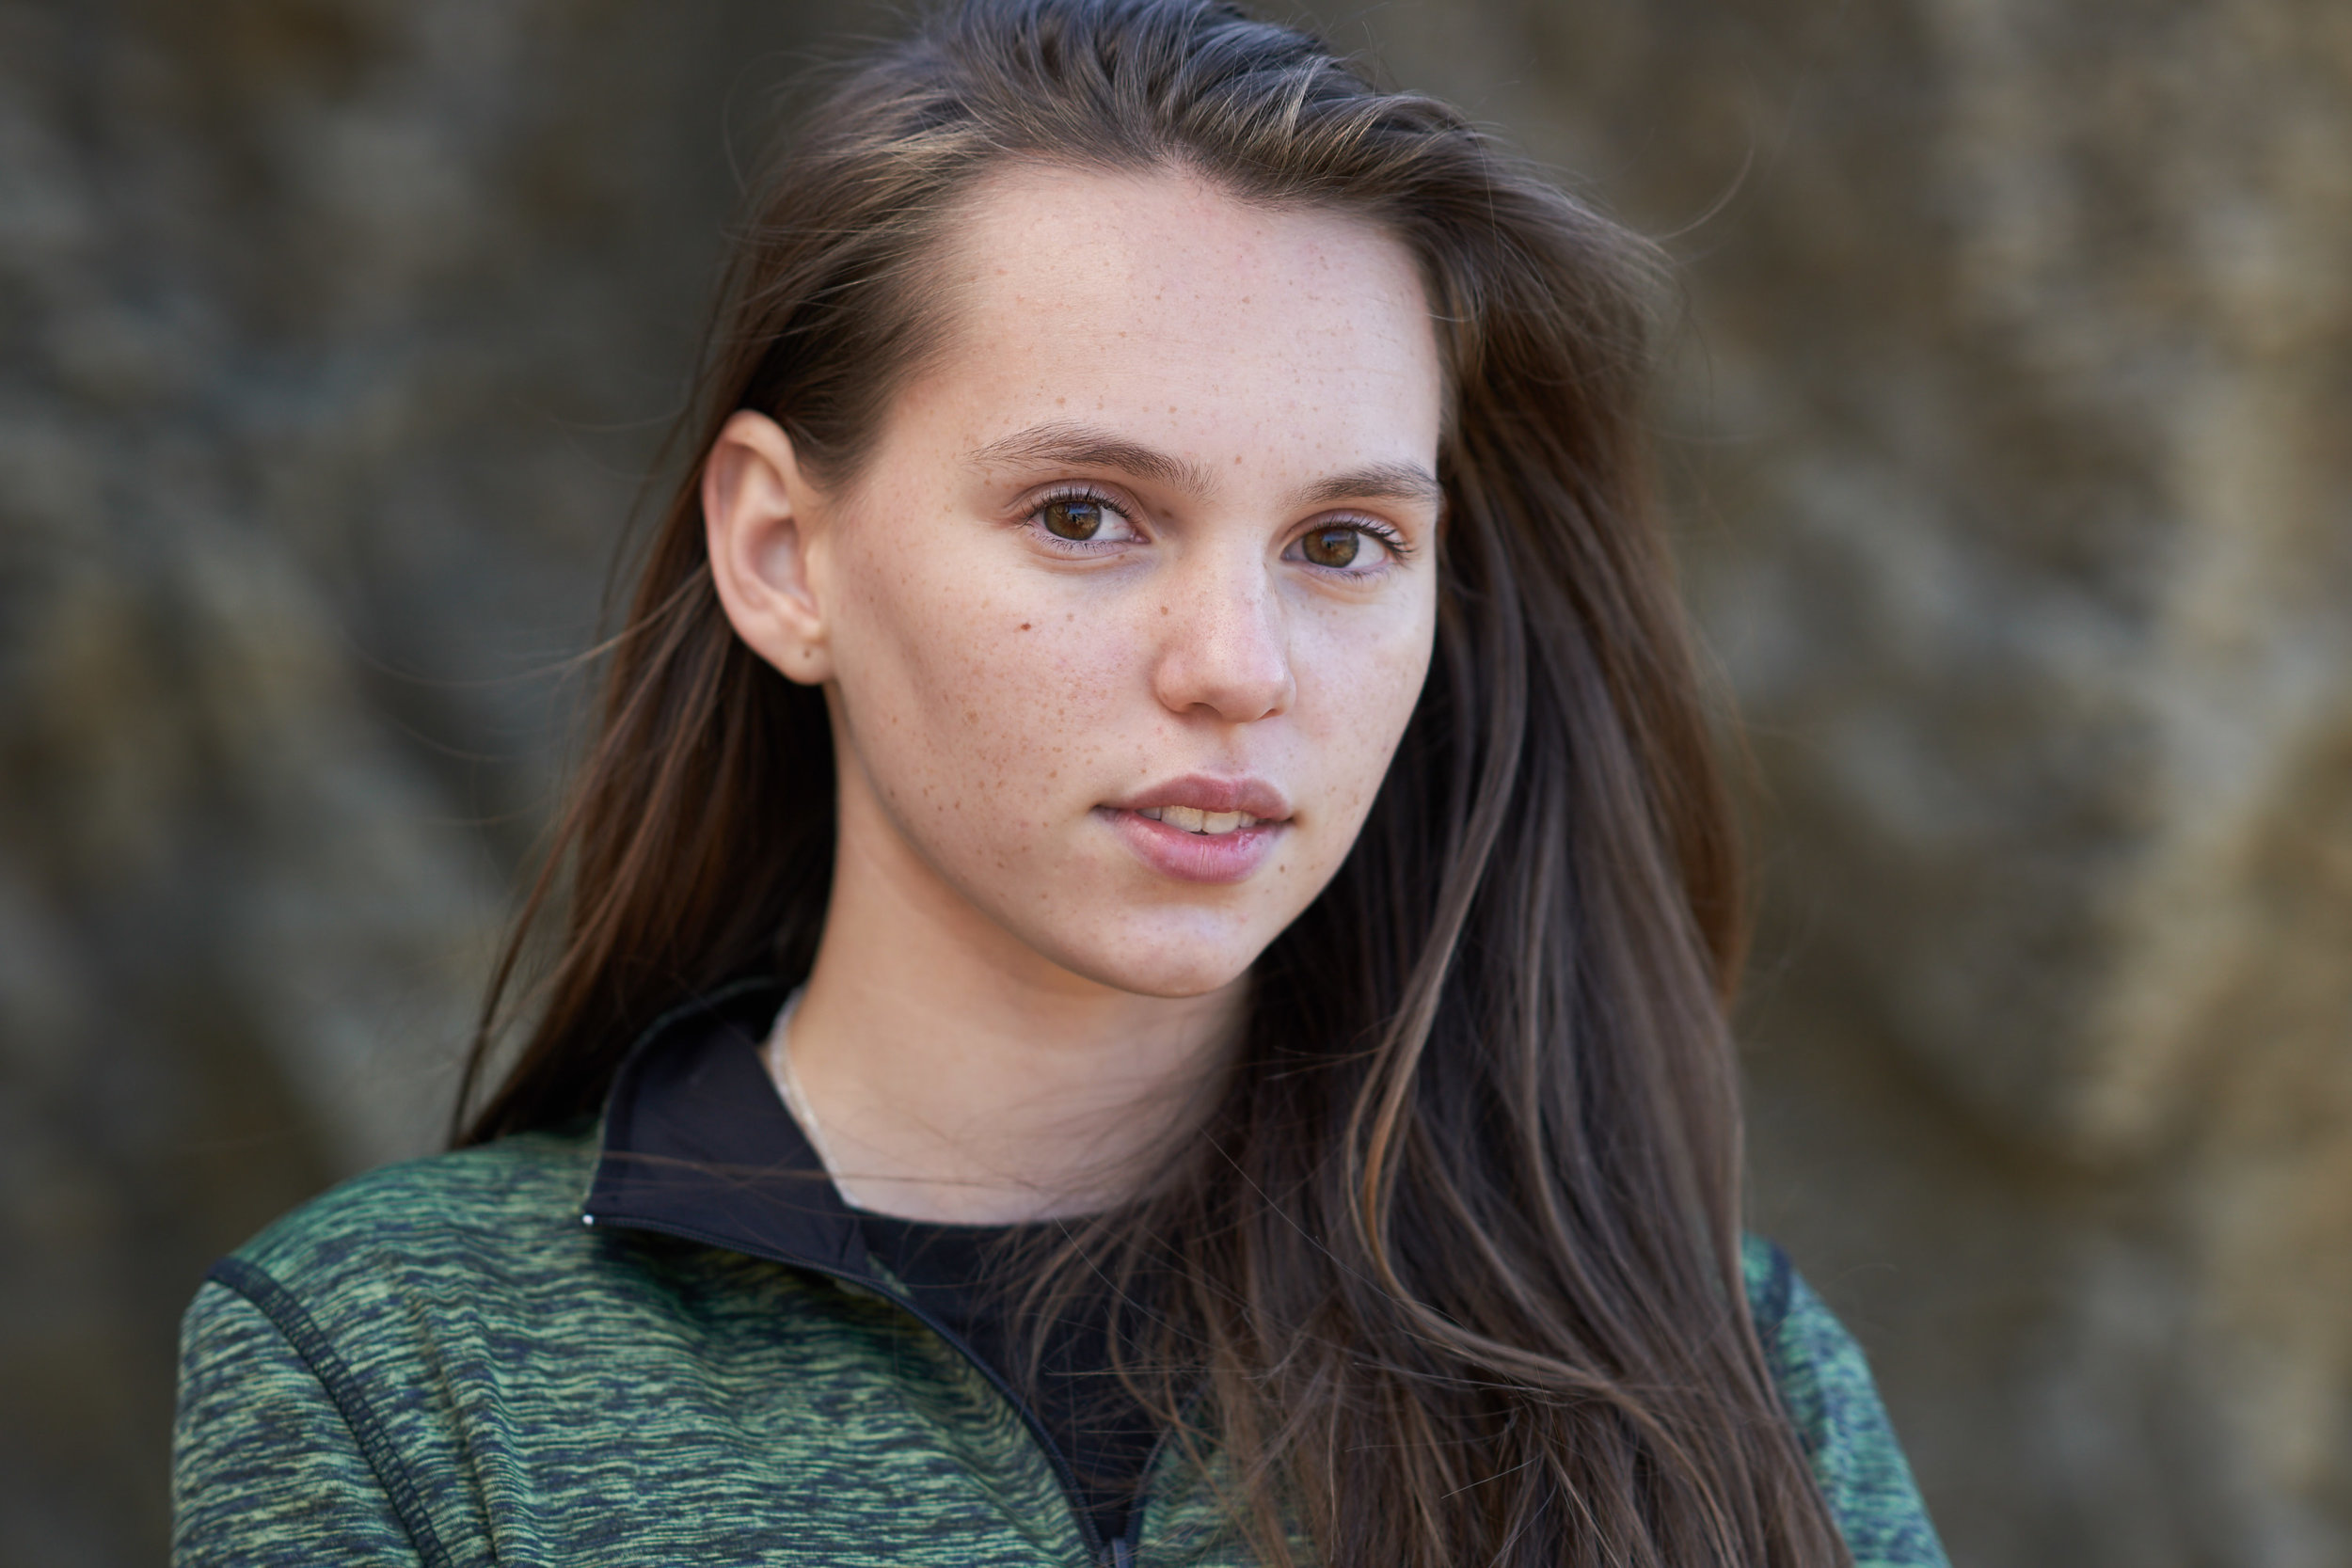
This second set of images was in the exact same location but I turned the model 180 degrees so that the sun was now behind her. The sun is now our rim light and I brought in the reflector nice and close on the right side which fills in her face in a lovely way. It produces a sparkle to her eyes and gives her skin a great glow, balancing out the image. You can compare the image with and without the reflector. I was also thinking about my background in this image. In the first set you can see that the background is quite bright compared to the model’s face but on the second set I wanted the image to have a darker background. To achieve this darker background, when I turned the model I made sure that the background behind her was in the shade of the hillside. This allowed her face to be the brightest area of the frame bringing more attention to it.
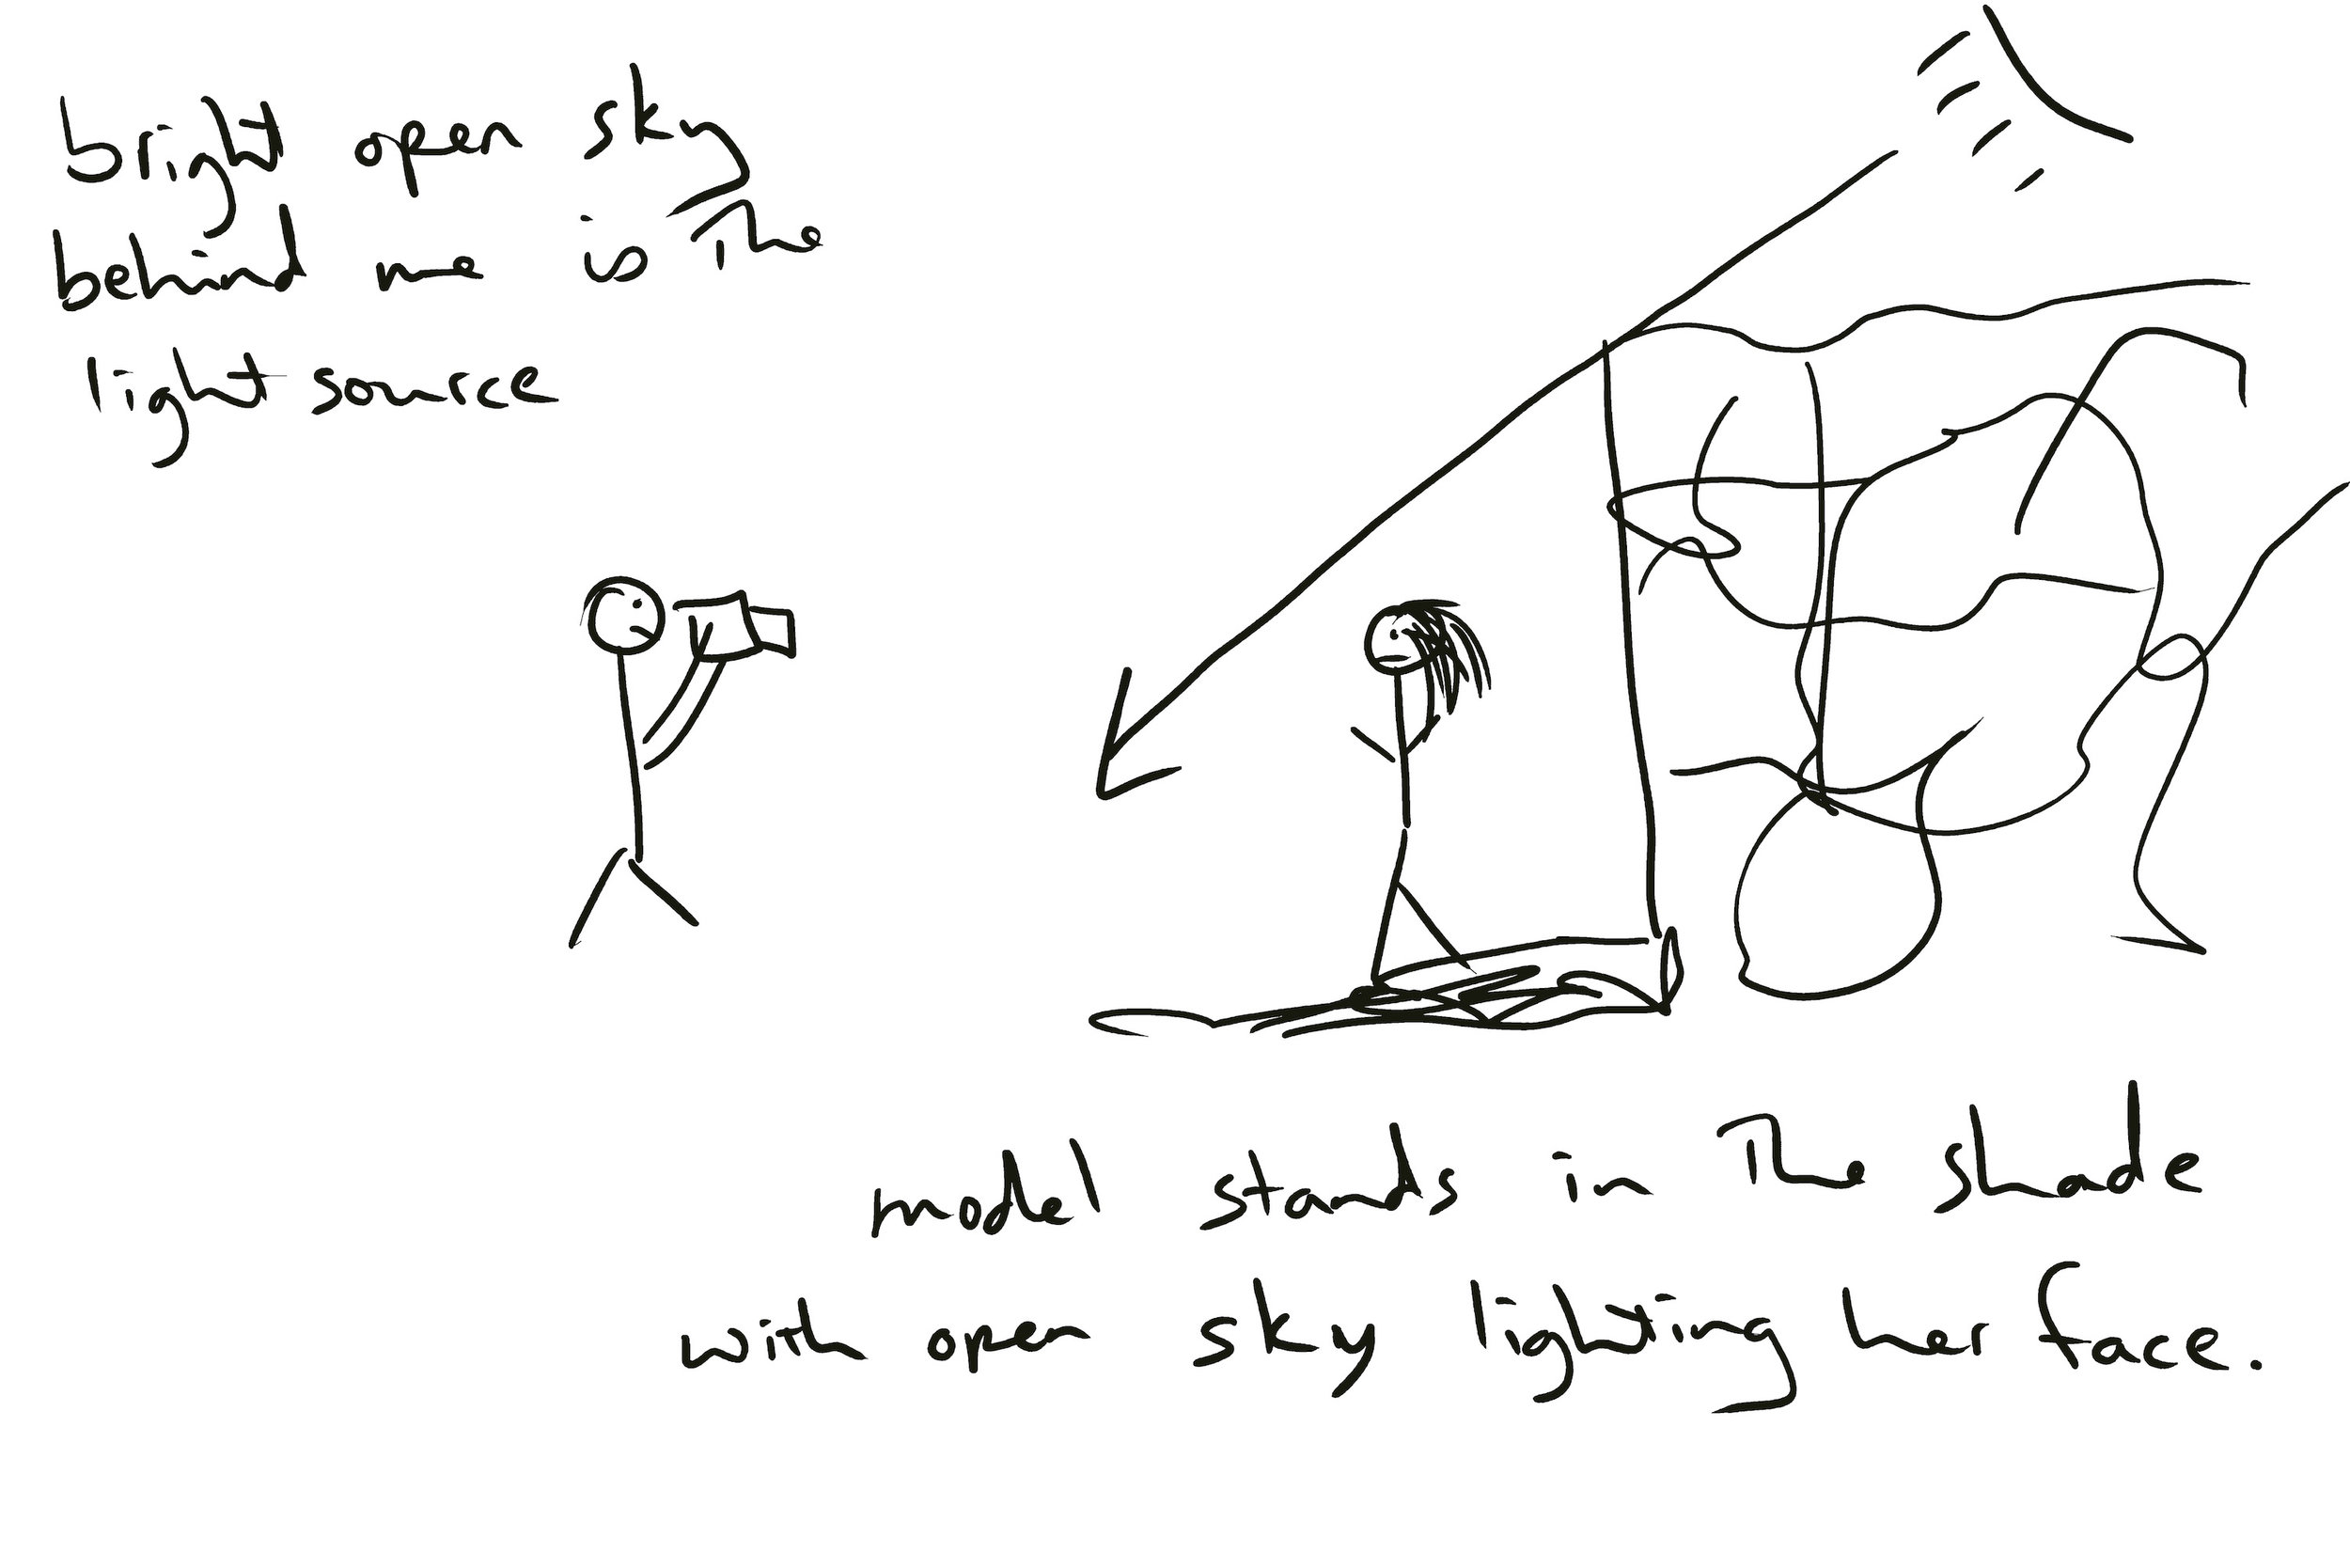
On this image I am using only the sunlight without any reflector or diffuser. You can see in her eyes the reflection of the sky behind me. The sky was a bright blue, providing me an enormous soft light source. I chose the location for its tone and texture knowing that I was going to allow the focus to fall off considerably. It was a wall of rock that was in the shade which made it darker and not as contrasty as the rock that was in the sun allowing me to use the sky as my softbox. This quality of lighting would cost an awful lot of money to make in the studio, but here on location it is free! These images were shot at f2.
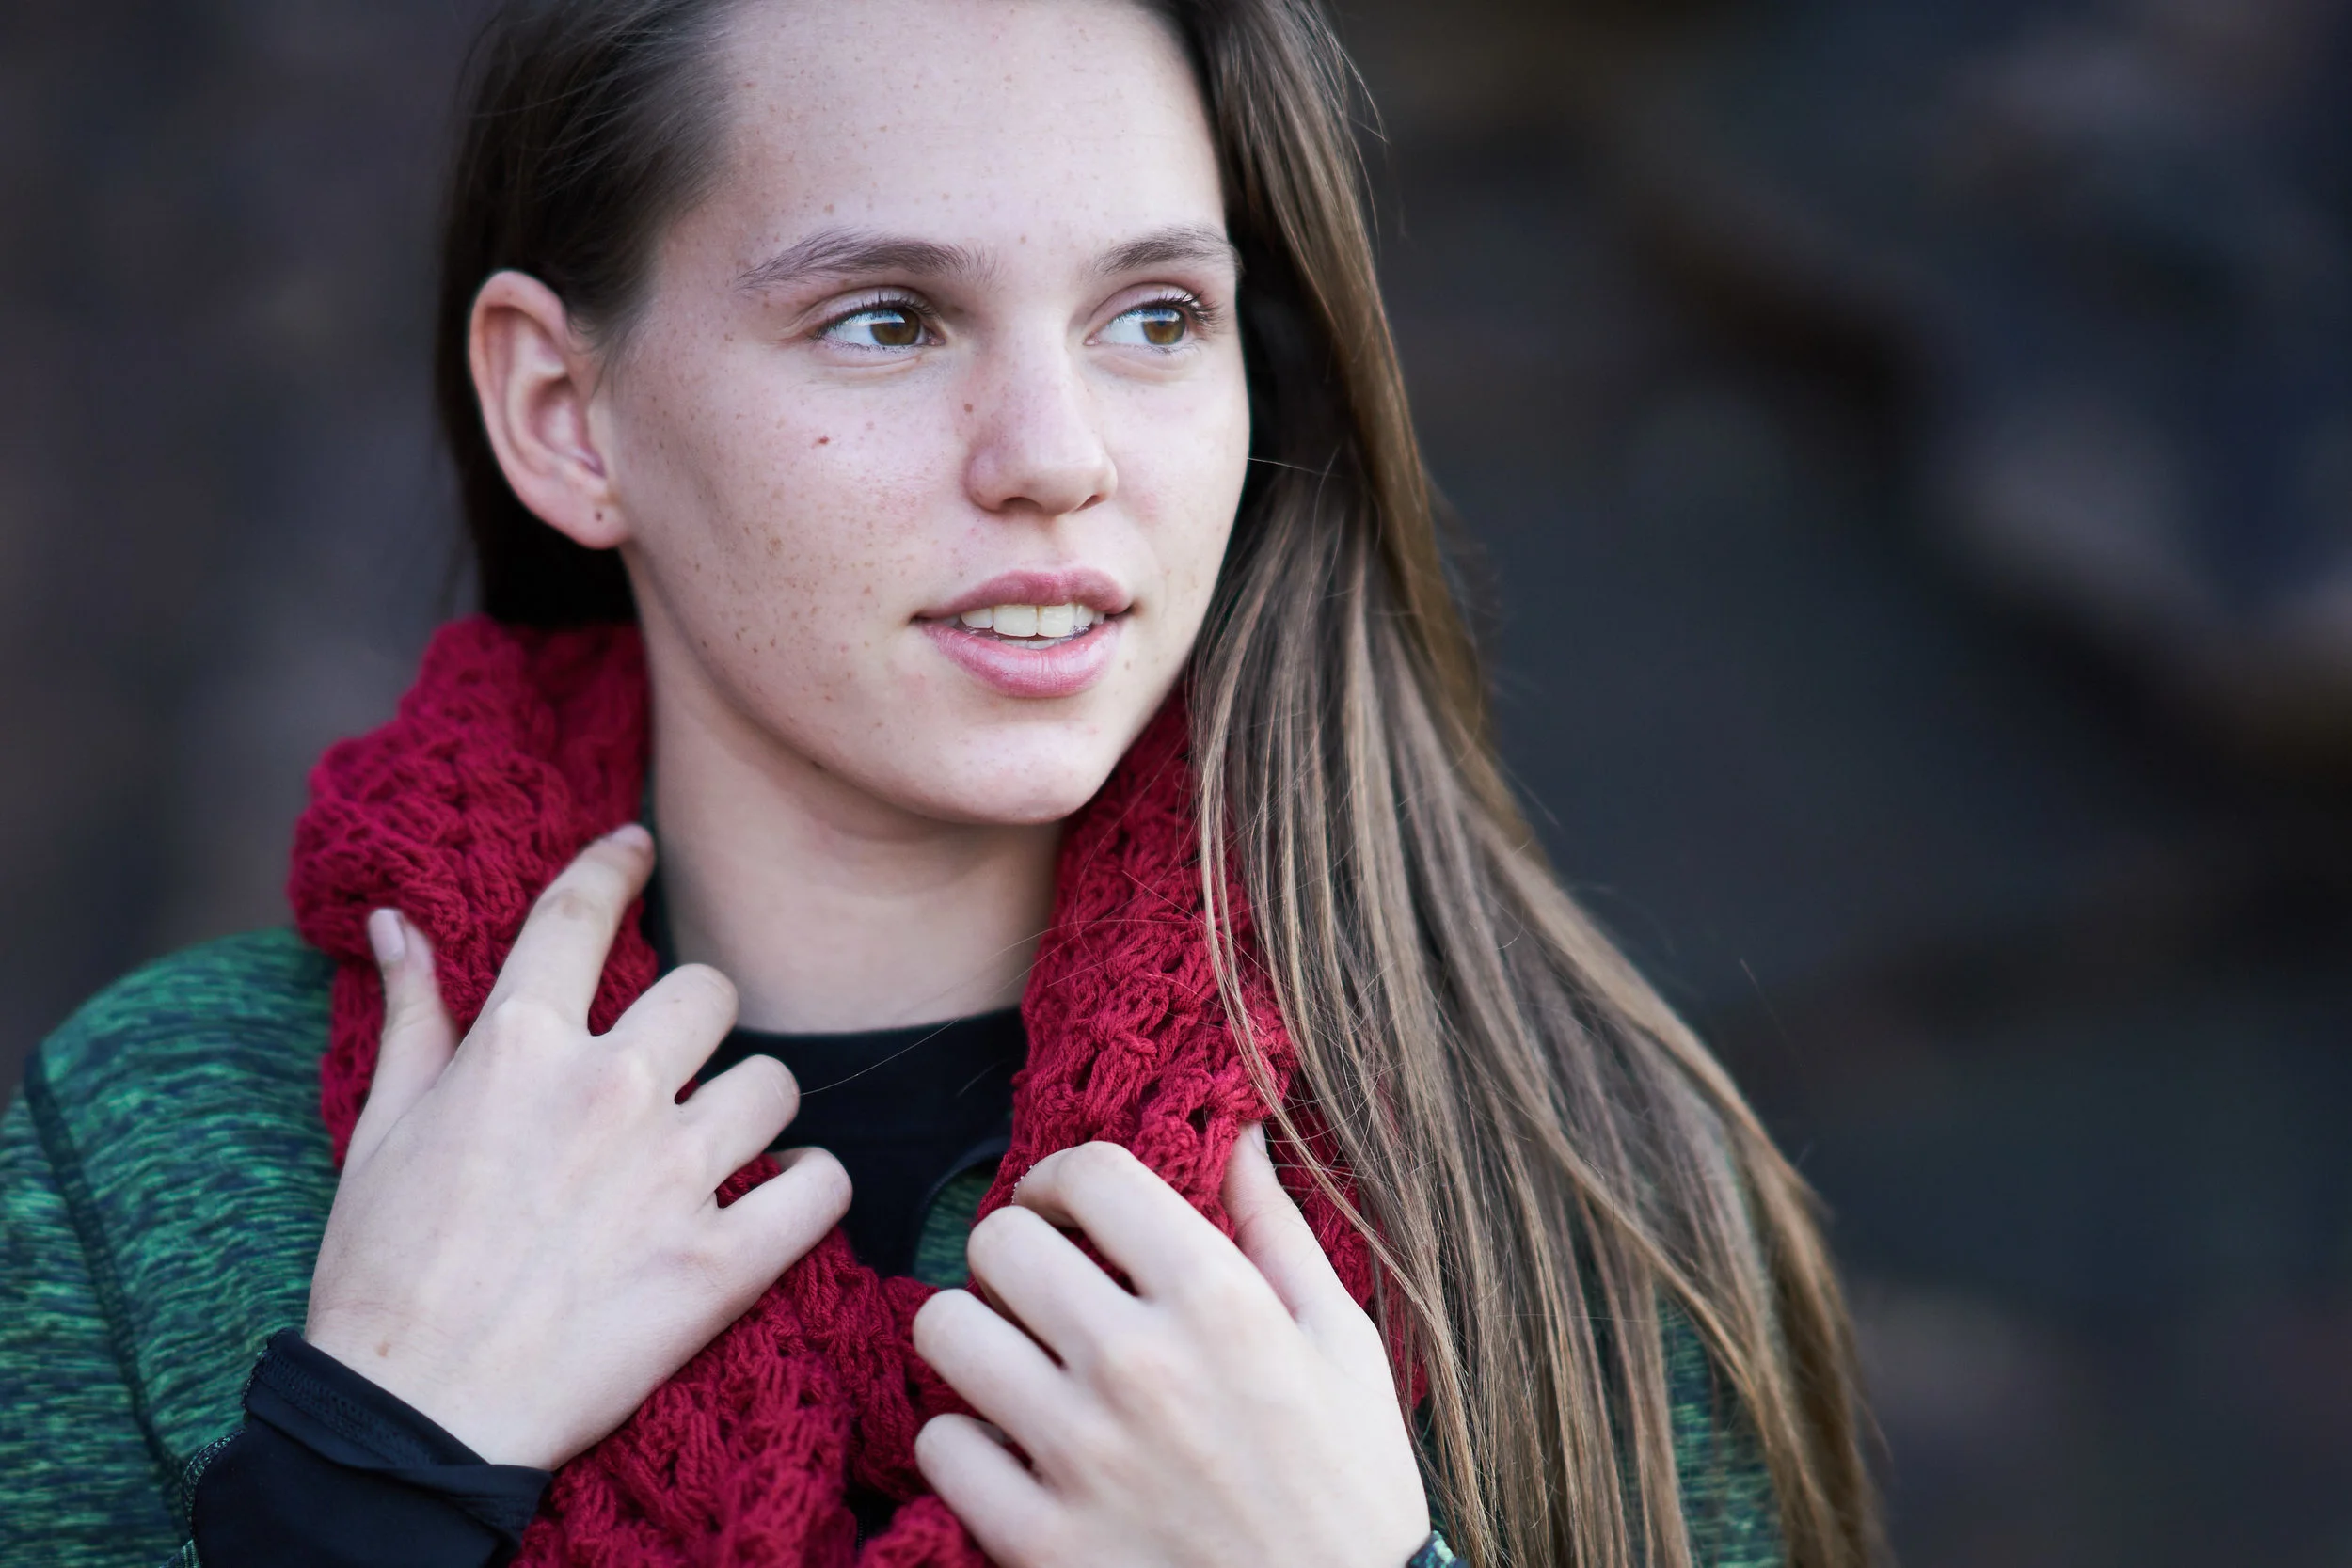
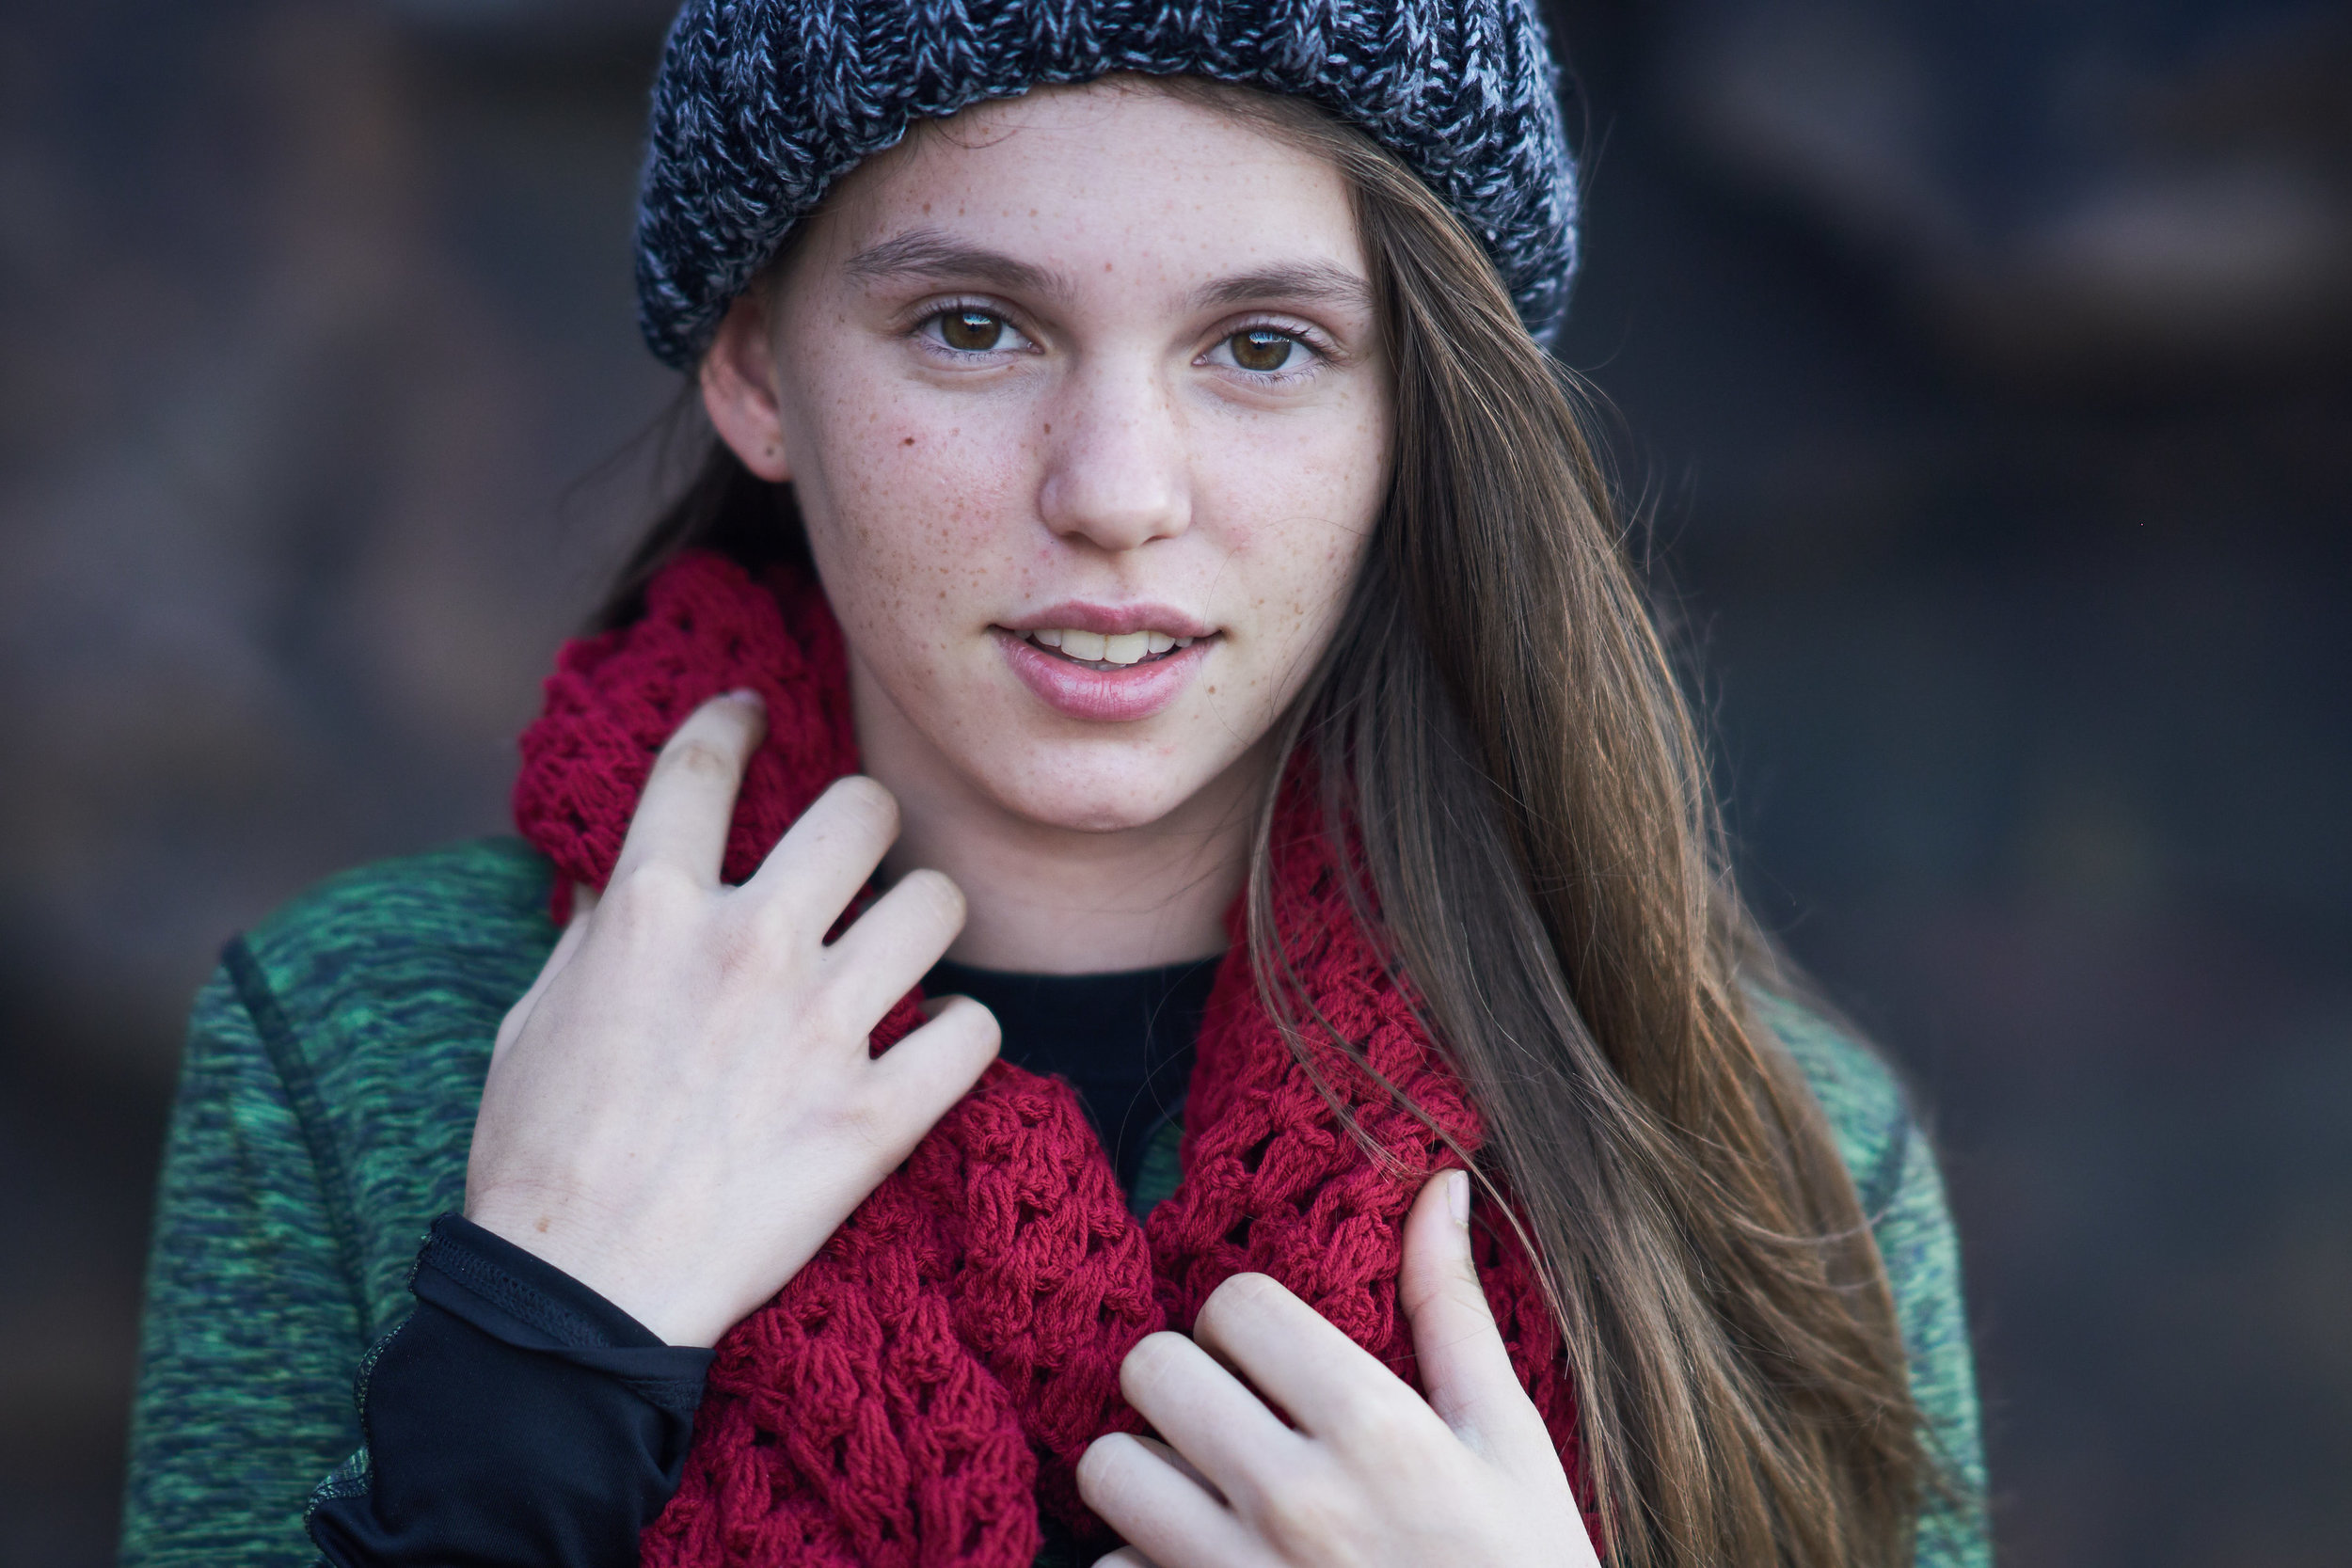
For this final set of images we introduced more texture and color with the use of a scarf and then a hat. The location is once again a rock face that was shaded but yet had a great dark texture. Behind me I again had the bright blue sky giving me soft light that still allows enough shadow to be interesting but yet makes the skin look incredible. These images were shot at f1.4.
As you can see by these few examples, the possibilities for portraits out in the sun are incredible if you understand some basics about light and your equipment. As you walk through setting up your image, remember that you can achieve great images if you learn to see the light, to realize where it is coming from, where it is reflecting, where are the shadows, and how can I modify that light to make it more pleasing. It really is not about carrying bags and bags of gear. It is about seeing the possibilities in using some simple tools mixed with creativity. It is not magic, it is about seeing your world with new eyes, with deeper understanding, and with creative passion.
Take care and a Happy New Year to all of you!